
How to Sync Loops to Tempo in Any DAW
Learn exactly how to sync loops to tempo in Ableton, Logic, FL Studio, and Pro Tools—plus the plugins that handle it automatically so you never manually stretch a sample again.

Get Co-Producer and Arcade with unlimited access to premium, royalty-free samples and instruments. Plus, unlock Portal, Thermal, and Movement.
Try it freeHow to Sync Loops to Tempo in Any DAW
Loops recorded at a fixed BPM don't care what tempo your session is running, and that mismatch creates drift, phasing, and grooves that fall apart against your grid. Every major DAW handles tempo sync differently, so we're breaking down the specific workflows for Ableton, Logic, FL Studio, and Pro Tools, plus the plugins that eliminate manual adjustment entirely.
Why loops fall out of sync with your session
Loops fall out of sync because they're recorded at a fixed BPM that doesn't match your project tempo. A drum loop captured at 95 BPM will play back at 95 BPM regardless of what your session is set to. This causes the loop to drift against your grid and phase against other elements in the arrangement.
Without correction, transients land off the beat, phrases end early or late, and the groove falls apart. The loop sounds disconnected from everything else in the track.
Some tempo adjustment methods also shift pitch. Speeding up a loop raises its pitch, while slowing it down lowers it. Depending on the material, this might be desirable or completely wrong for your track.
How DAWs handle tempo sync for audio loops
Modern DAWs use two primary approaches to sync loops: time-stretching and beat-slicing. Both achieve the same goal but work differently under the hood.
- Time-stretching: The DAW analyzes the audio and stretches or compresses it to fit the new tempo while preserving pitch. This works well for moderate tempo changes but can introduce artifacts at extreme settings.
- Beat-slicing: The loop is chopped at transient points, and each slice is repositioned to align with the grid. This approach maintains audio quality but can create gaps or overlaps if the slicing isn't accurate.
- Warp markers and flex markers: These are manual control points that let you fine-tune how audio conforms to tempo. You place markers at key hits, and the DAW stretches or compresses the audio between them.
Each DAW implements these concepts differently, but the underlying logic remains consistent. Once you understand the mechanics, moving between platforms becomes straightforward.
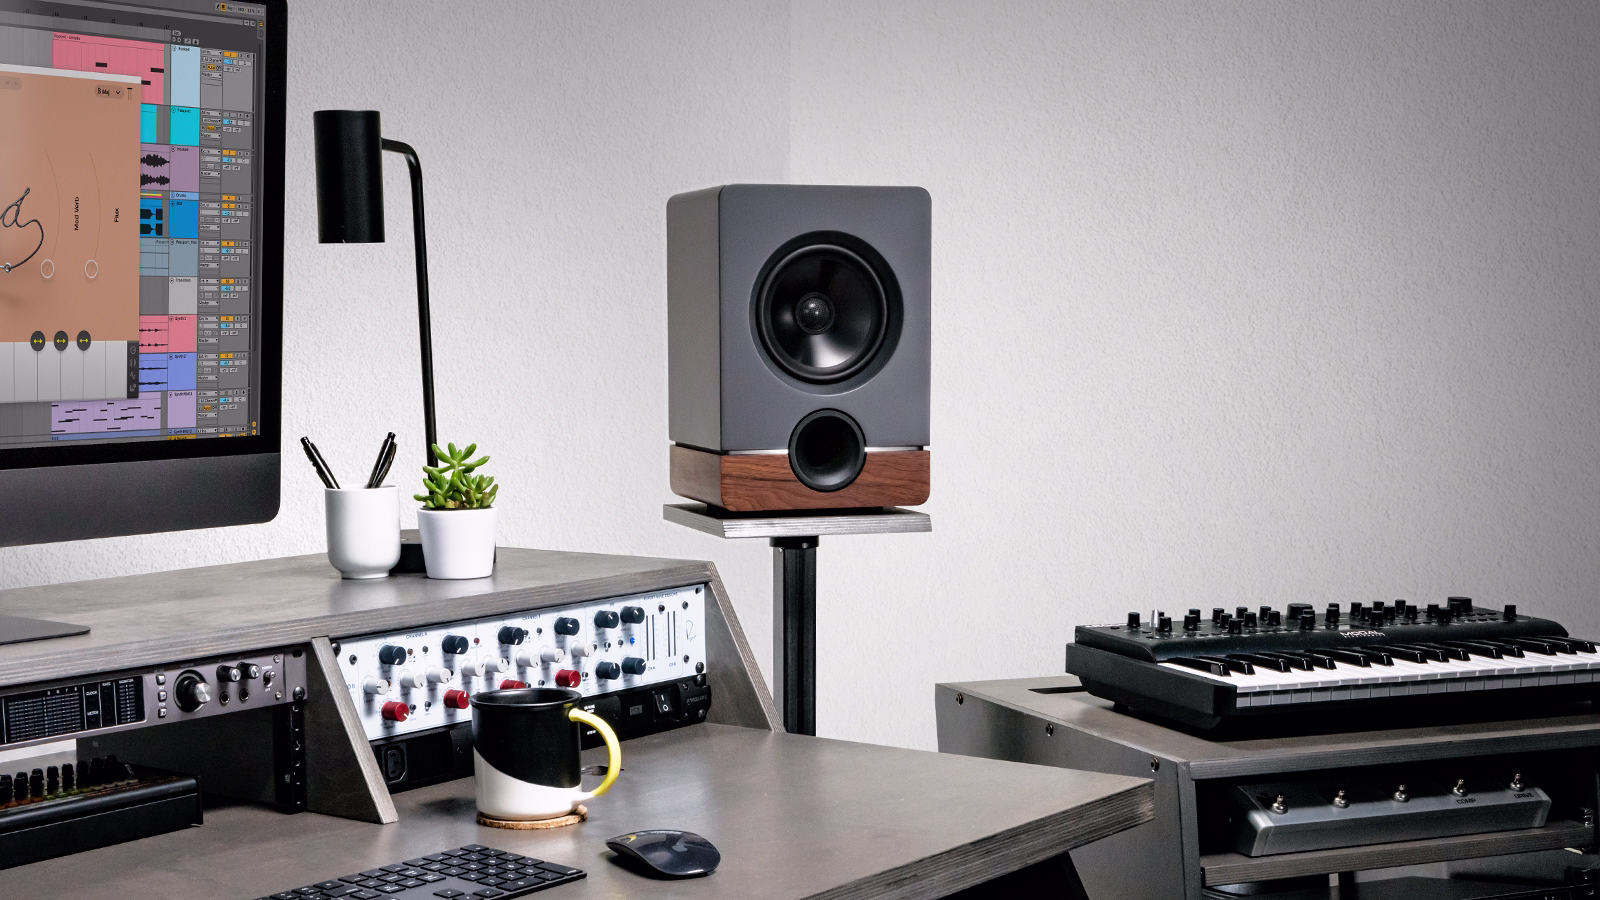
How to sync loops to tempo in Ableton Live

Ableton's Warp function is the core tool for tempo sync. When Warp is enabled, clips automatically conform to your session tempo.
Enable Warp in the clip view by clicking the Warp button. If Ableton misdetects the original tempo, manually enter the correct BPM in the Seg. BPM field. This tells Ableton how fast the loop was originally recorded so it can calculate the correct stretch ratio.
Choose the appropriate warp mode based on your content:
- Beats: Best for drums and percussive loops—including drum machine samples. Preserves transient attacks.
- Tones: Works well for melodic content with clear pitch, like bass lines or synth phrases.
- Texture: Ideal for pads, ambiences, and complex textures where transient preservation matters less.
- Complex/Complex Pro: Use for full mixes or loops with multiple elements. Higher CPU usage but cleaner results on dense material.
Ableton can auto-warp imported samples when "Auto-Warp Long Samples" is enabled in preferences. This speeds up workflow but occasionally requires manual correction when detection fails. Pairing Warp with the right Ableton Live plugins can further streamline your sample workflow.
How to sync loops to tempo in Logic Pro
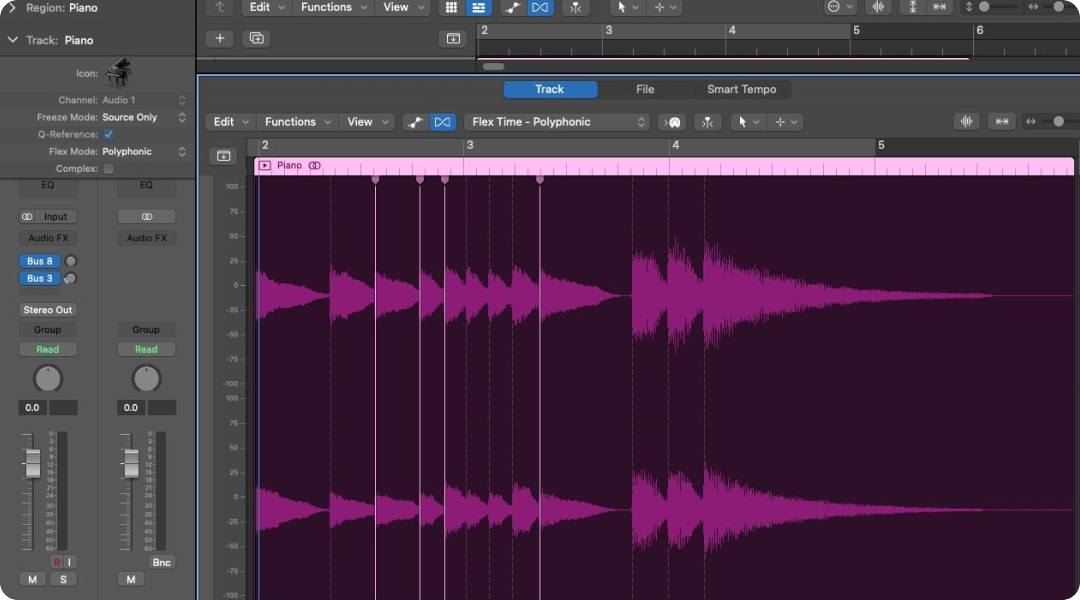
Logic uses Flex Time to handle tempo sync. The system analyzes transients and creates flex markers that allow the audio to stretch or compress.
Enable Flex Time by clicking the Flex button in the track header. Then select the appropriate Flex mode from the dropdown.
- Slicing: Best for drums and rhythmic loops. Chops at transients and repositions slices.
- Rhythmic: Works for guitars, keyboards, and other rhythmic content with some sustain.
- Polyphonic: Use for complex harmonic material like piano or full mixes.
After enabling Flex, select the region and enable "Follow Tempo" in the region inspector. This locks the loop to your session tempo, so it automatically adjusts when you change BPM.
Smart Tempo can analyze imported loops and detect their original tempo automatically. This works well for clearly defined rhythmic content but may struggle with ambient or irregular material. Combining Flex Time with dedicated Logic Pro X plugins handles both tempo sync and sound shaping in one workflow.
How to sync loops to tempo in FL Studio

FL Studio offers multiple approaches to tempo sync, making it flexible for different workflows. Producers making type beat samples often need to sync loops quickly, and FL's options accommodate that speed.
Right-click the audio clip in the Playlist and select "Fit to tempo" for automatic adjustment. FL Studio will stretch the clip to match your project BPM.
For more control, access stretch modes in the sample settings:
- Resample: Changes pitch with tempo, like a classic sampler. Useful for lo-fi or vintage effects.
- Stretch: Time-stretches while preserving pitch. The standard choice for most production work.
- Slice: Chops at transients for rhythmic material. Maintains quality but requires accurate transient detection.
If FL Studio misdetects the tempo, use Edison or the channel settings to manually input the correct BPM. You can also adjust the time multiplier to correct half-time or double-time detection errors.
How to sync loops to tempo in Pro Tools
.avif)
Pro Tools uses Elastic Audio for tempo sync. The system works similarly to other DAWs but integrates tightly with Pro Tools' session structure.
Enable Elastic Audio by selecting an algorithm from the track header dropdown:
- Rhythmic: Best for drums and percussive loops. Prioritizes transient accuracy.
- Polyphonic: Works for complex harmonic content with multiple voices.
- Monophonic: Use for single-note melodic lines like bass or lead synths.
Use the TCE (Time Compression/Expansion) trim tool to manually stretch clips to bar boundaries. This gives you precise control over loop length and alignment.
For sessions where you plan to change tempo, enable "Tick-based" timing for the track. Tick-based clips follow tempo changes automatically, while sample-based clips maintain their original length regardless of session tempo.
Plugins that simplify loop tempo sync
Native DAW tools work, but dedicated plugins can eliminate tempo sync friction entirely. The right tool previews samples in sync before you commit, saving the back-and-forth of importing, adjusting, and auditioning.
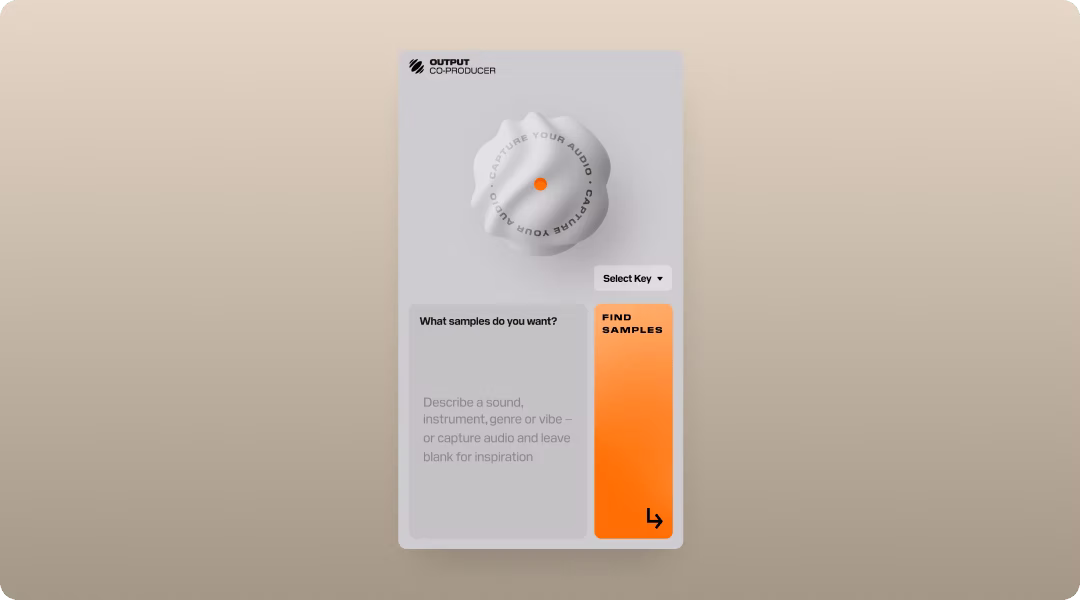
Co-Producer previews samples already synced to your session's tempo and key before you drag them in. It listens to your track and surfaces samples that fit, so every preview plays in context.
- Session-aware recommendations: Co-Producer analyzes your track and suggests samples that match your tempo, key, and vibe. The plugin captures 4 or 8 bars of your audio—8 bars recommended for richer harmonic and rhythmic analysis—then finds complementary samples based on that content.
- Drag-and-drop workflow: Pull samples directly into your DAW without leaving your session or manually adjusting BPM.
- Unlimited access: No credits or rationing. Browse and preview as much as you need.
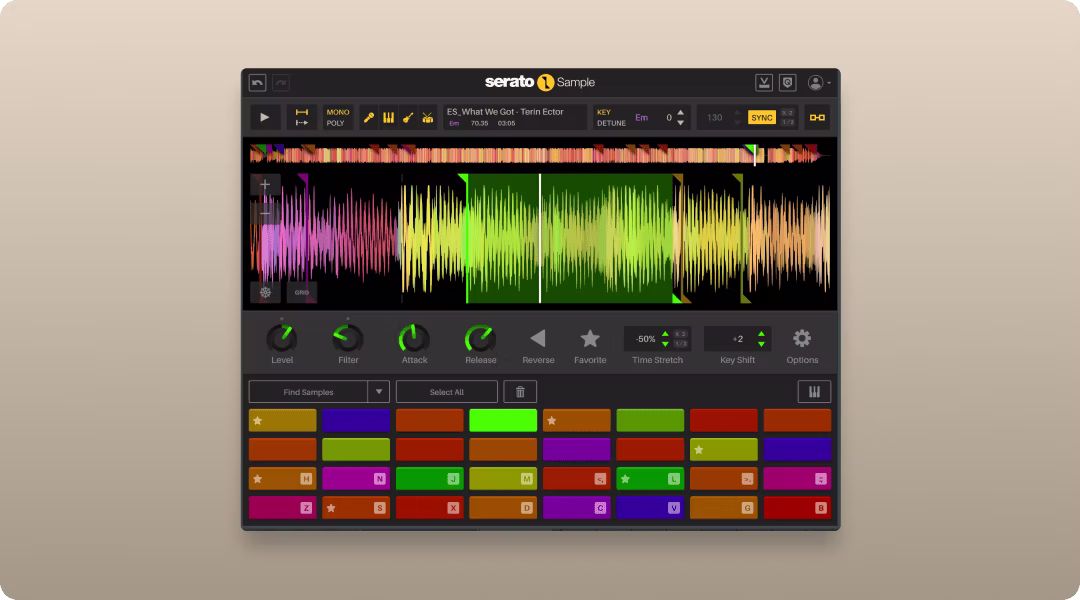
Serato Sample offers automatic BPM detection and syncing with pitch-lock, plus easy chopping and re-sequencing.
- Automatic sync: Detects loop tempo and locks it to your session instantly.
- Pitch-lock: Preserves original pitch when changing tempo.
- Pad-based chopping: Slice loops and trigger sections from pads for quick rearrangement.
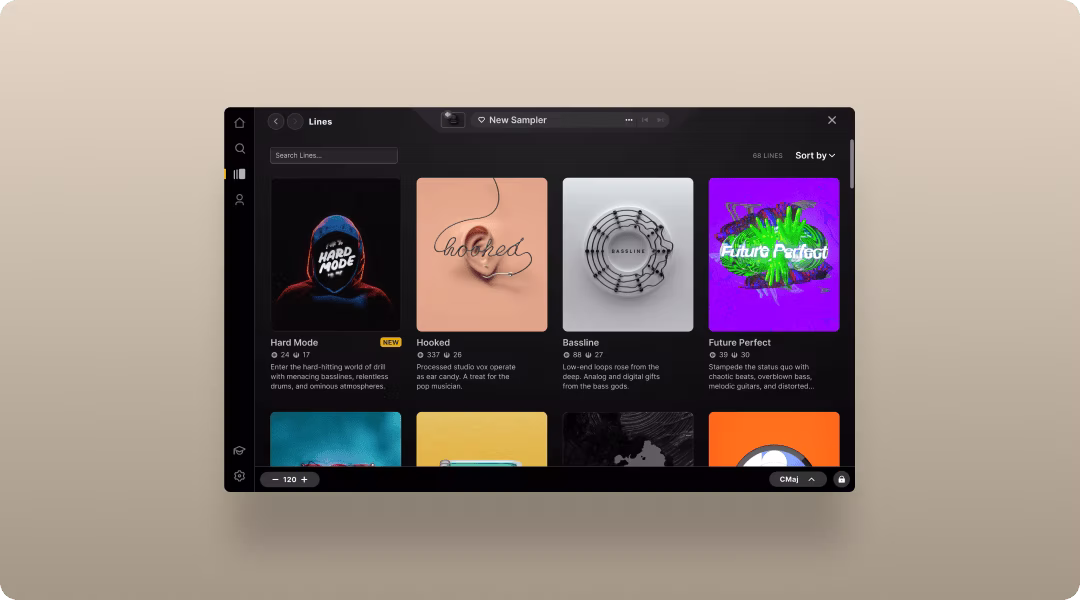
Arcade locks all content to your session tempo automatically. You can focus on playing, manipulating, and chopping rather than configuring settings. The playable sampler workflow turns tempo sync into a non-issue.
- Automatic tempo and key lock: Every sample conforms to your session without manual adjustment. Arcade's Session Key selector shifts the pitch of all samples in a Sampler to match your song's key, so you can switch between kits without manual retuning.
- Playable kits: Trigger and perform loops in real time rather than just dragging static files.
- Built-in manipulation: Shape sounds with macros, modifiers, and FX directly inside the plugin, or use the Sampler Generator to slice any sample across the keyboard.
Co-Producer, Arcade, and Output's FX plugins (Portal, Thermal, Movement) are all available together in Output One.
How to manually set loop tempo when auto-detection fails
Auto-detection works most of the time, but it fails predictably in certain scenarios. Knowing how to correct these errors keeps your workflow moving.
Half-time and double-time errors are the most common problem. If the DAW detects the loop at half or double the actual tempo, manually correct the BPM field. A 140 BPM loop detected as 70 BPM is a common issue with sparse material.
Using markers gives you manual control. Place warp markers (Ableton), flex markers (Logic), or transient markers at key hits to force alignment. This tells the DAW exactly where the beats should land.
Tap tempo works when you can't figure out the BPM by ear. Tap along with the loop to determine its actual tempo, then input manually. Most DAWs include a tap tempo function in the transport bar.
Loop length calculation helps when you know the bar count. If you know the loop is exactly 4 bars, use your DAW's "Set 1 Bar" or similar function to define the length. The DAW calculates the correct tempo from there.
How to preserve audio quality when stretching loops
Time-stretching degrades audio quality, especially at extreme tempo changes. Understanding the tradeoffs helps you make better decisions about when to stretch and when to slice.
Stay within reasonable range. Stretching works best within 10-15 BPM of the original tempo. Beyond that, artifacts become more noticeable. Transients smear, and the overall sound loses definition.
Choose the right algorithm. Percussive content handles stretching differently than melodic content. Use transient-focused modes for drums and polyphonic modes for harmonic material.
Slice instead of stretch. For extreme tempo changes, slicing at transients often sounds cleaner than stretching. The audio between slices remains unprocessed, preserving the original quality.
Layer or process. Use saturation, compression, or reverb to mask minor artifacts from stretching. Sometimes a little processing makes stretched audio sit better in the mix. Portal's granular processing can transform stretched loops into entirely new textures if artifacts become a creative opportunity rather than a problem. The plugin slices audio into tiny grains that can be stretched, overlapped, and pitch-shifted independently—turning timing artifacts into rhythmic or textural elements. Understanding granular synthesis opens up more creative possibilities with stretched loops.
How to change session tempo without breaking synced loops
Working with tempo changes mid-project requires understanding how your DAW handles timing. The wrong settings can cause loops to drift or lose sync entirely.
Tick-based vs. sample-based timing is the key distinction. Tick-based clips follow tempo changes. Sample-based clips stay at their original length. Set loops to tick-based timing if you plan to adjust session tempo.
Tempo automation requires attention to loop settings. When using tempo changes in your arrangement, ensure loops are set to follow tempo. Some DAWs require this setting per-region or per-track.
Consolidating before tempo changes can preserve timing relationships. Sometimes bouncing loops in place before major tempo shifts creates a new audio file at the current tempo, avoiding unexpected behavior.
Testing playback catches problems early. Always audition loops after tempo changes to catch any drift or artifacts. Small errors compound over time and become obvious in the final mix.
Performance tip: When using Arcade for live tempo changes, enable Input Quantize in Playback Settings to ensure samples always start on the beat, even when triggering manually during tempo transitions.
Build a faster sample workflow with tempo-synced tools
The fastest workflow removes manual tempo adjustment entirely. Instead of importing, detecting, correcting, and stretching, you preview samples that already fit and drag them directly into your session.
Co-Producer listens to your session and surfaces samples that match your track's tempo and key. Every preview plays in sync before you commit, so you hear exactly how the sample will sit in your arrangement. For best results, use descriptive search terms combining style, genre, and instrument type. Producers working across styles, from boom bap type beats to afrobeat type beats, benefit from tools that handle tempo sync automatically across diverse sample sources.
Arcade locks all content to your session automatically. You can focus on playing, chopping, and manipulating rather than configuring settings. The playable sampler workflow turns tempo sync into a non-issue.
Both tools, along with Portal, Thermal, and Movement, are available in Output One.
Frequently asked questions
Can you change loop tempo without changing pitch in Ableton?
Yes. Enable Warp on the clip and select any warp mode except "Re-Pitch." Ableton will stretch the audio to match your session tempo while keeping the original pitch intact.
Why does my loop sound choppy after using Flex Time in Logic?
Artifacts occur when the Flex algorithm struggles with the audio content. Try switching to a different Flex mode, or use Slicing mode to chop at transients instead of stretching the audio between them.
How do you find the original BPM of a loop that has no metadata?
Use tap tempo while the loop plays, or import the loop and use your DAW's tempo detection. If detection fails, manually set the loop length to a known bar count and let the DAW calculate the tempo.
Do Co-Producer and Arcade require manual tempo sync?
No. Both tools automatically lock samples to your session's tempo and key. Every preview plays in sync, and dragged samples conform to your project without manual adjustment.
Output One includes Co-Producer, Arcade, Portal, Thermal, and Movement—so you can sync, shape, and finish loop-based ideas in one workflow, plus all FX expansions. Get everything together in a single subscription and move from tight timing to a full track quicker.
Try it free