
As a music lover, you know how important the kick drum is in practically all popular music from blues to techno. There’s nothing quite like standing in front of a large sound system and feeling every part of your body resonate when that perfect 808 hits.
A well-crafted kick drum can invoke aural, physical, and even emotional sensations. A great kick drum allows us for a brief moment to experience the transmundane, but conversely, a bad kick drum can make your track completely fall apart. The stakes are pretty high, so it makes sense to learn about what makes a kick tick.
The anatomy of a kick drum
In most contemporary songs, and certainly in the majority of electronic and dance music, the kicks you hear are synthetic creations. They’re generated with a modulated sine wave and made to sound like the recording of a physical kick drum. In order to make your own kick from scratch, it’s important to understand the instruments these sounds are based on. Let’s examine them briefly.
Physical kick drums have two drumheads, which doubles the vibrating mass of the instrument, and allows it to sustain longer. The kick drum is also the largest drum in a kit, meaning that it creates lower frequencies than the others.
When the kick pedal (mallet) strikes the stretched surface of the kick drum, it creates a high-frequency sound that drops in pitch and amplitude (volume level) over time. We can see and hear these same characteristics in the waveform of both an acoustic and synthesized kick drum. Let’s examine the kick from a Roland TR-909 drum machine, a classic sound that has appeared on countless records. You’ve likely heard it many times before.
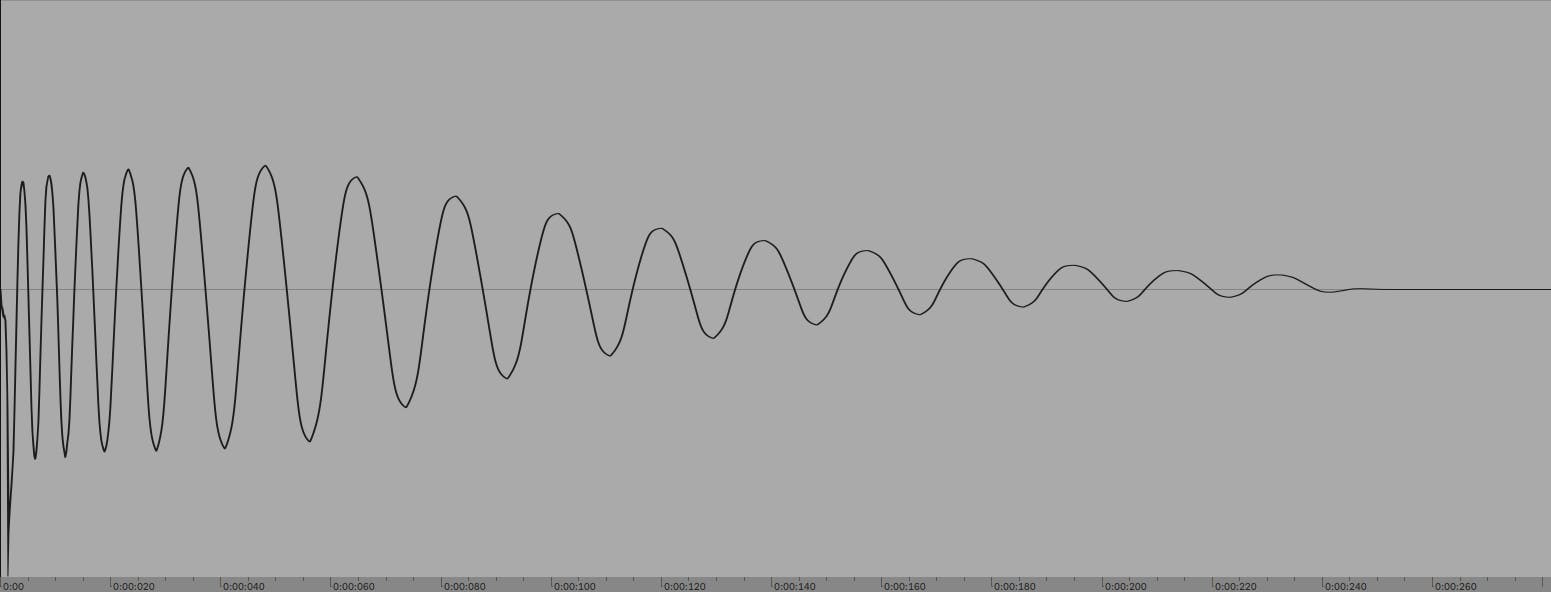
It might not look like much, but there’s a lot to learn in this little waveform. In this image, you can see that the waveform is more bunched up at the start of the sound on the left, and becomes more spaced out as the sound progresses. This indicates that it drops in pitch. And, we can tell from the first few cycles that are less rounded at the peak that there are some more complex harmonics present at the start of the sound. This is what gives the kick its mid-range punch.
You’ll also notice that the waveform’s amplitude (vertical height) decreases as the sound progresses. This shows us that the sound lowers in volume over time, which also contributes to its punchy, percussive feeling.
Volume-based processing
Sound is all about movement, and nowhere is this more apparent than the kick drum. The often quick drop in pitch and volume is what gives the kick its punchy sound and feel, and if we edit the kick, we can change that feeling.
For example, let’s try adjusting the volume level at the start of the sound with a fade.
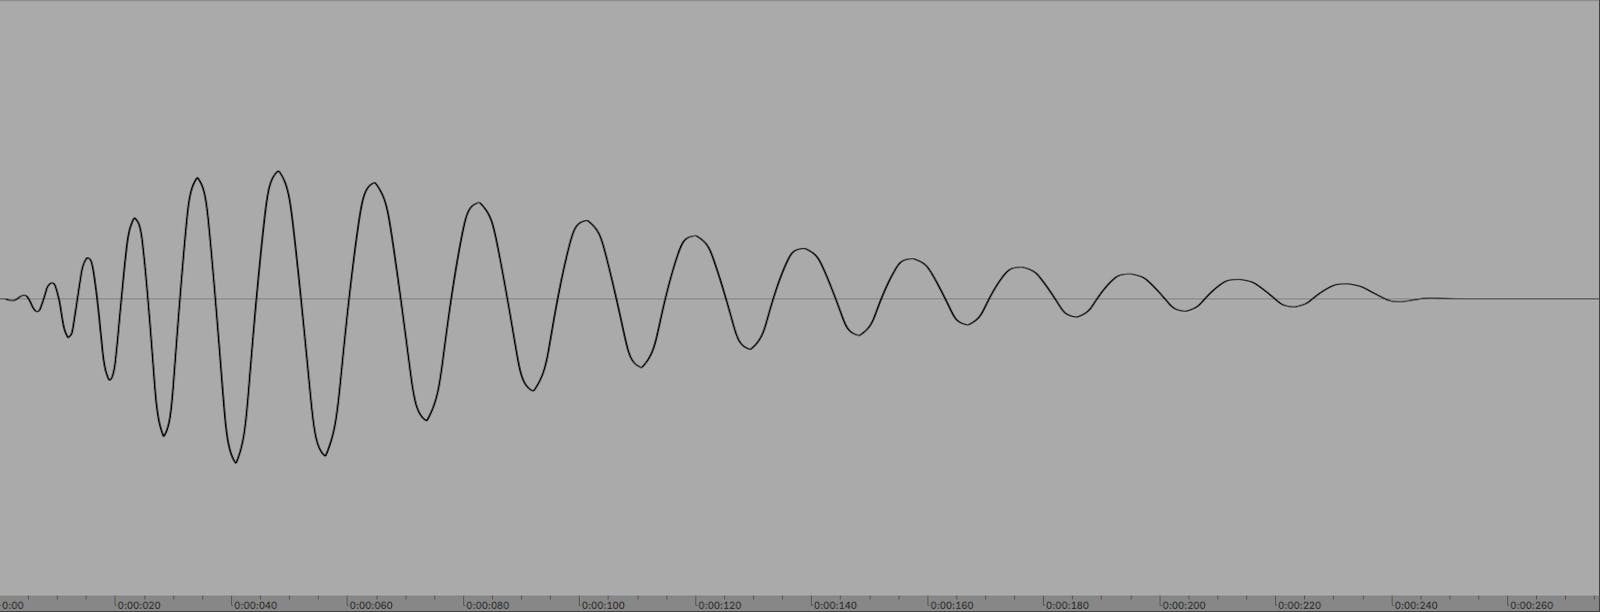
Here, a fade is applied to the start of the sound, and you can see that rather than starting suddenly and loudly, the amplitude ramps up. This has the effect of dulling the transient (the loud and fast burst at the start of the sound), making this once punchy kick more of a soft thud.
This makes a conspicuous change to the sound without resorting to tools like a transient shaper, compressor, equalizer, or any other kind of effect. Simply adjusting the volume at the start of the sound changes the kick’s mid-range energy, because that’s where that energy lives. The effect we’ve created here is quite drastic, but you can dull the sound more subtly with a less severe fade.
The inverse happens if we fade the end of the sound instead.
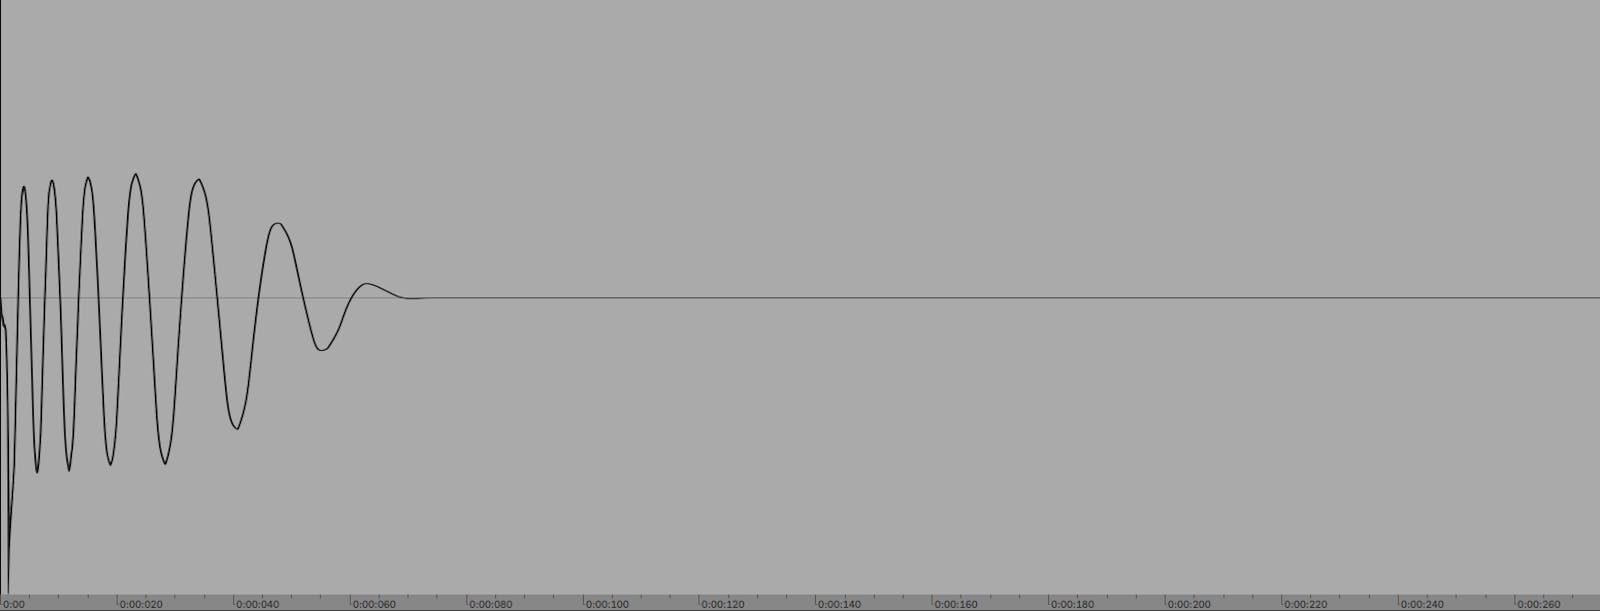
Here the end of the kick is dramatically faded, and you can hear that we’re left with just the “attack” portion at the start of the sound. This reduces the low-frequency energy in the sound by removing the end of the sound, again affecting the frequency content and making the sound more snappy without using any kind of dynamics processing or effects.
As you can see, it’s possible to substantially change the character of kicks just with basic volume level-based audio editing techniques. Sometimes working in this way is more efficient, and can yield more desirable results than FX processing.
Tuning and pitch
Another one of the most fundamental ways to change the sound of a kick drum is to change its tuning. Some producers argue that tuning kicks isn’t necessary, but take a listen to these two clips, with a kick drum tuned three semitones apart.
Clearly, each has a different feel, and you likely prefer one over the other. So, sometimes you might find it useful to at least experiment with different tunings. Though, you may be writing a track around a kick drum sound, in which case you’ll likely make choices that are sympathetic to its tonal qualities.
Tuning low-frequency sounds such as kicks can be challenging, especially if you’re working with a less-than-optimal monitoring situation. In this case, try tuning your kicks up a few octaves so their tonal qualities are easier to hear, tune them, then drop them back down to their original octave. This can be particularly useful with 808 kicks that are played chromatically (at different pitches), because in this scenario they’re melodic instruments rather than just rhythmic events, and blur the line between percussion and instrument.
Another tool you can use to make the tonal characteristic of a kick easier to discern is saturation — genres of music including hardstyle and hardcore techno revolve around heavily saturated kicks with very obvious tonal characteristics. Try adding some saturation to a kick you’re struggling to tune and remove it once you’re done.
Phase and polarity issues
A less obvious factor that can cause issues with kick drums is how the kick fits with other sounds in the context of a mix. When two or more sounds are layered on top of each other, they can cause what’s known as destructive interference, and this can have an especially damaging effect on the weight of low-end sounds. For example, this can result in a kick and bass sounding quieter when layered on top of each other, because they’re “out of phase” (misaligned) and cancel each other out. Let’s check out an example.

If you look at the first few cycles of the waveforms, you’ll see that the 909 waveform moves up when the 808 is heading down. When these are “summed” (added) together by the DAW’s mix engine, they cancel each other out, which results in a quieter sound.
However, if we reverse the polarity of one of the waveforms, essentially flipping it upside down, we get a much different result.
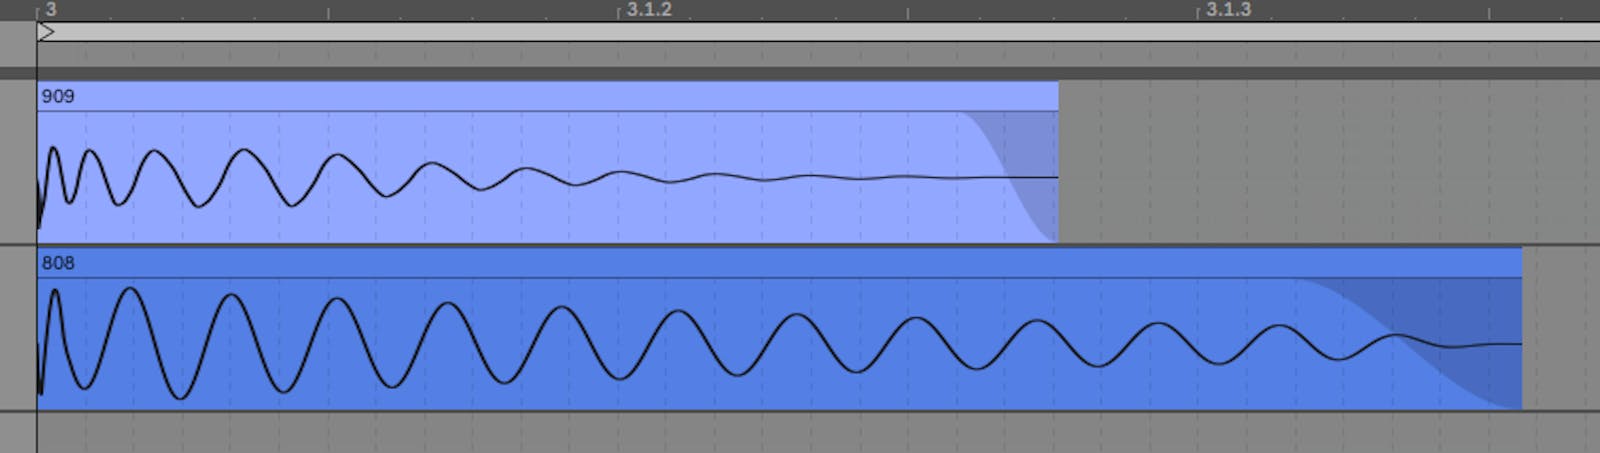
If you look at the left-hand side of the image you’ll see that thanks to the polarity inversion the initial cycles of the waveforms behave in a more sympathetic manner. We’re using the same samples, but the result sounds much different.
You can use your DAW’s dedicated polarity inversion capabilities to achieve this, or you could get different results by using small timing adjustments to your audio or MIDI clips.
Equalization and layering
A common technique in contemporary music production is to use an equalizer (EQ) to take unnecessary low-end out of sounds to make a track cleaner and increase the amount of available headroom in the mix. When used with kick drums this needs to be performed with care. A kick’s weight is found in the low-end and removing too much can blunt its impact.
You might want to EQ the low-end of a kick include when it interferes with a bass, or when you’re attempting to layer multiple kick drums. Kick drum layering can be useful when your kick has a punchy attack stage or a weighty body that you like, but that’s lacking in another area.
For example, here’s a kick with an 808 bass line underpinning it. In this case, we want the 808 bass to be the lowest part of the mix, frequency-wise. So we can sacrifice the lows on the kick to prevent the ugly muddiness created when both parts play at the same time.
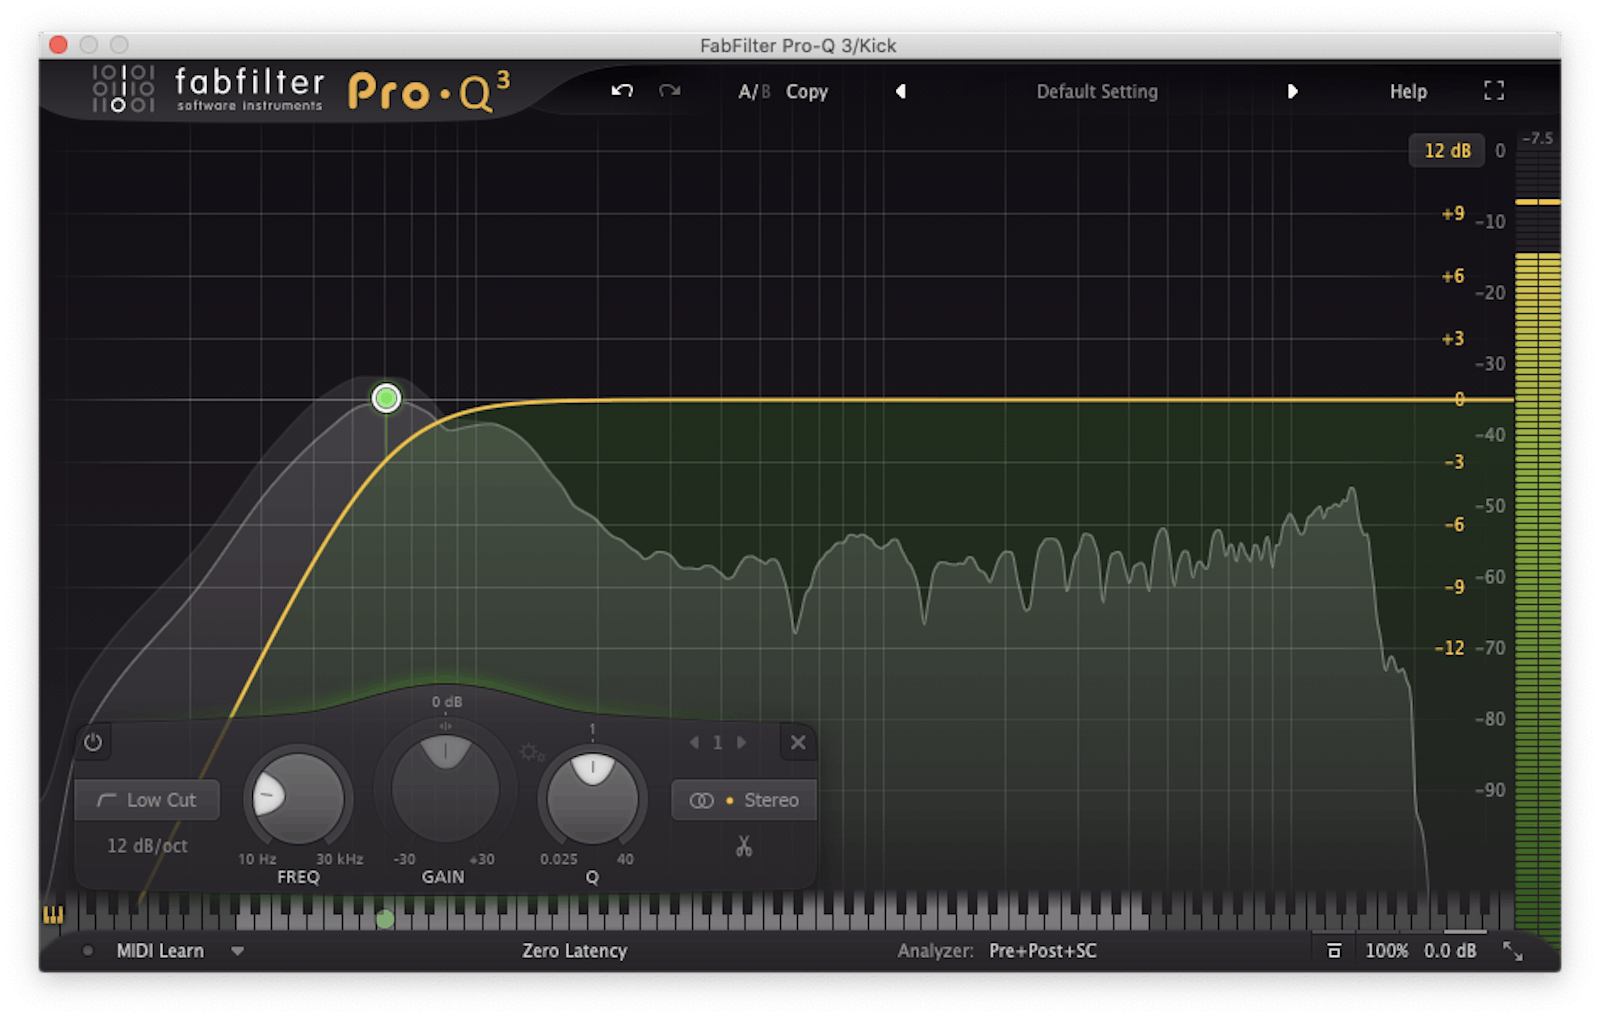
In the first audio clip, you can hear that the lows of the kick clash with the 808 bass line, creating a messy effect that adversely affects the clarity of the bass line’s pitch. In the second clip, the objectively undesirable interference has been removed, thanks to the high-pass filter on the FabFilter Pro-Q 3 plugin.
Sidechain compression and volume ducking
A technique that you can use in addition to or instead of EQ is to “sidechain” non-kick elements to the kick. Sidechain compression involves using a compressor effect to reduce the volume of other sounds whenever the kick plays. This helps the kick be heard more clearly in the mix, increasing its perceived volume level. It can be done in an exaggerated manner, or in a transparent (less obvious) manner.
In order to use a compressor for sidechain compression, you need to put the compressor on the track you’d like to reduce the volume of when the kick plays, and select the kick track as the sidechain input.
In this example, we have a kick playing at the same time as a synth bass. The synth bass masks the kick a little. But when we apply the sidechain compression in the second clip the kick can be heard much more easily, even though it’s playing at the same volume as before.
Another way you can achieve the same effect is to use a tempo-synced volume modulation effect such as Cableguys ShaperBox 2 or Xfer Records LFO Tool.
Dynamics and transient processing
Dedicated dynamics and transient processing plugins give you a great deal of control over the impact of your kicks. For instance, the free Flux BitterSweet v3 plugin offers a very simple approach to this, giving you a single knob that can be used to enhance or dull the attack stage of an audio signal.
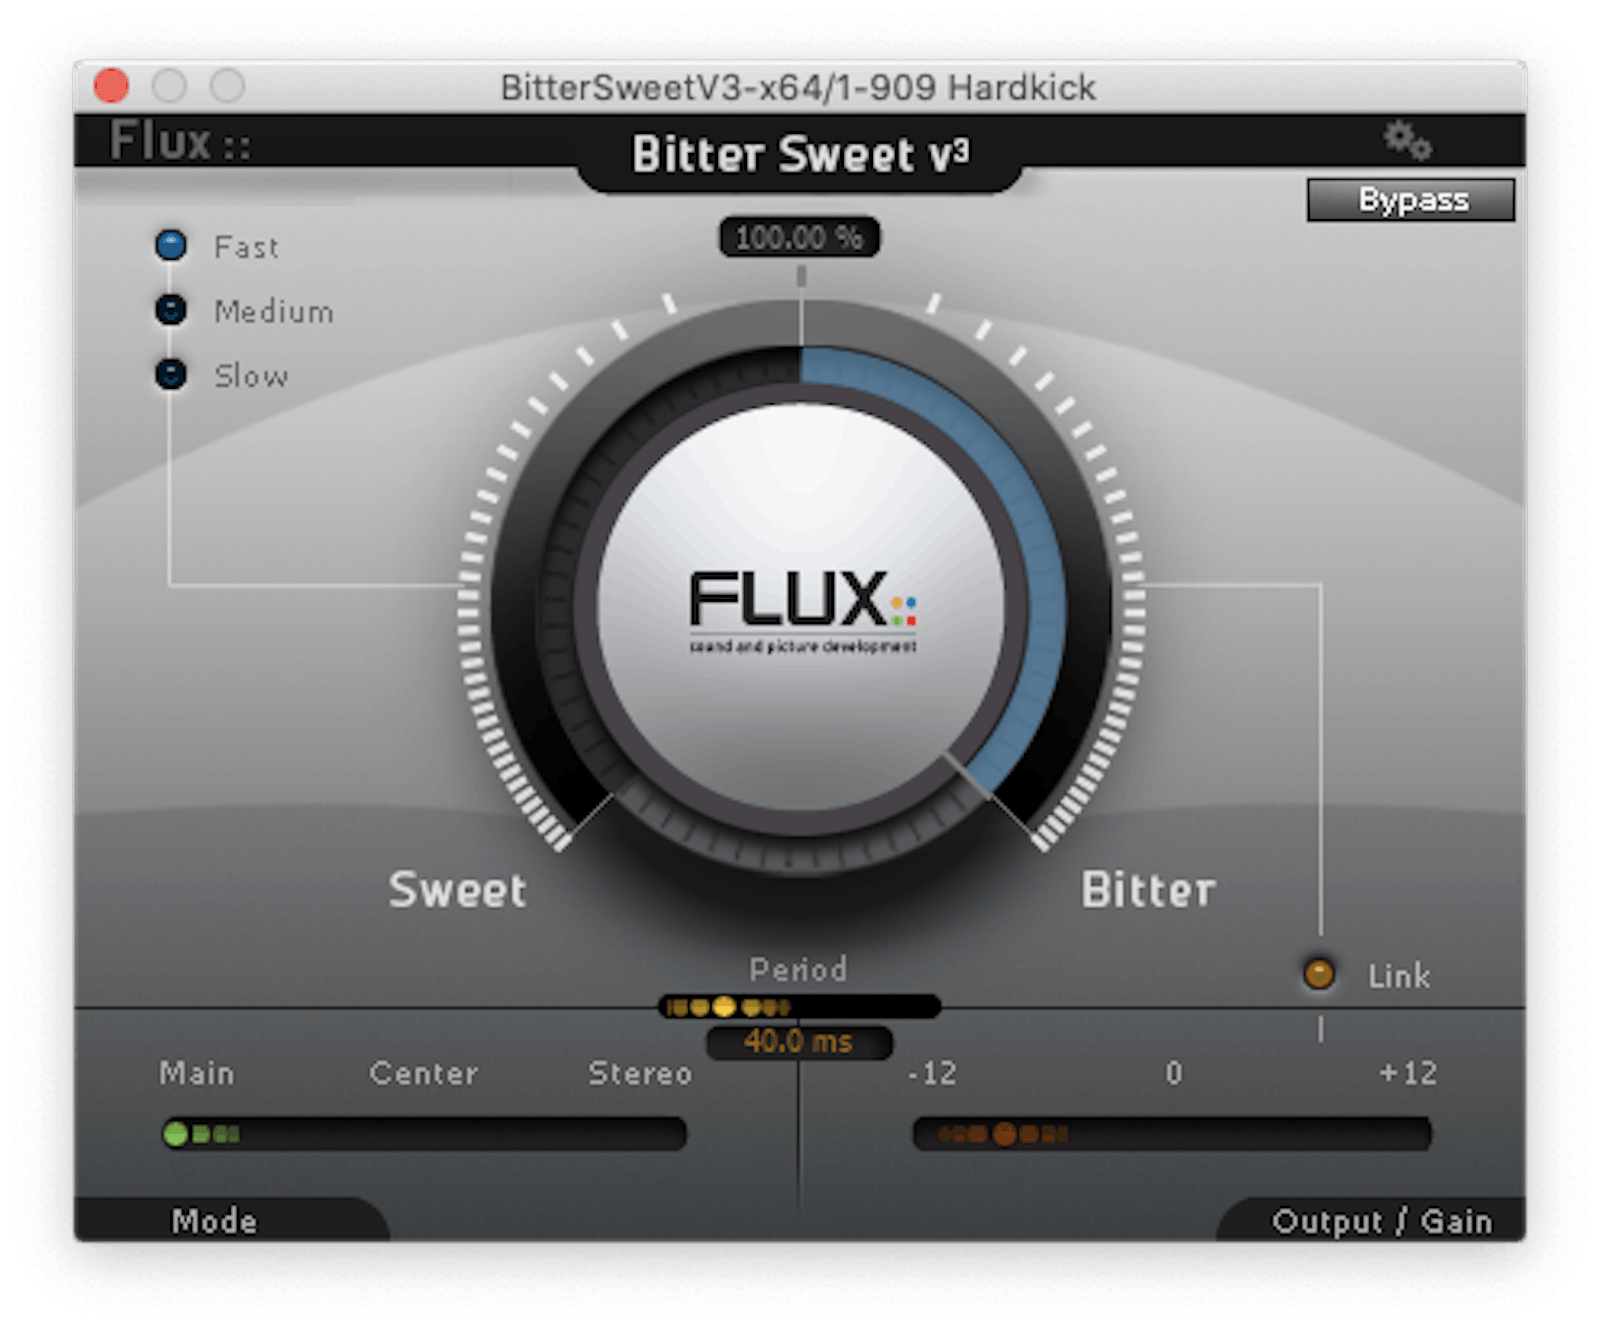
The first audio clip is the unprocessed kick drum track. The second applies the BitterSweet transient control set to 100%, making the kick punchier. The third features the transient control set to -100%, softening the kick sound.
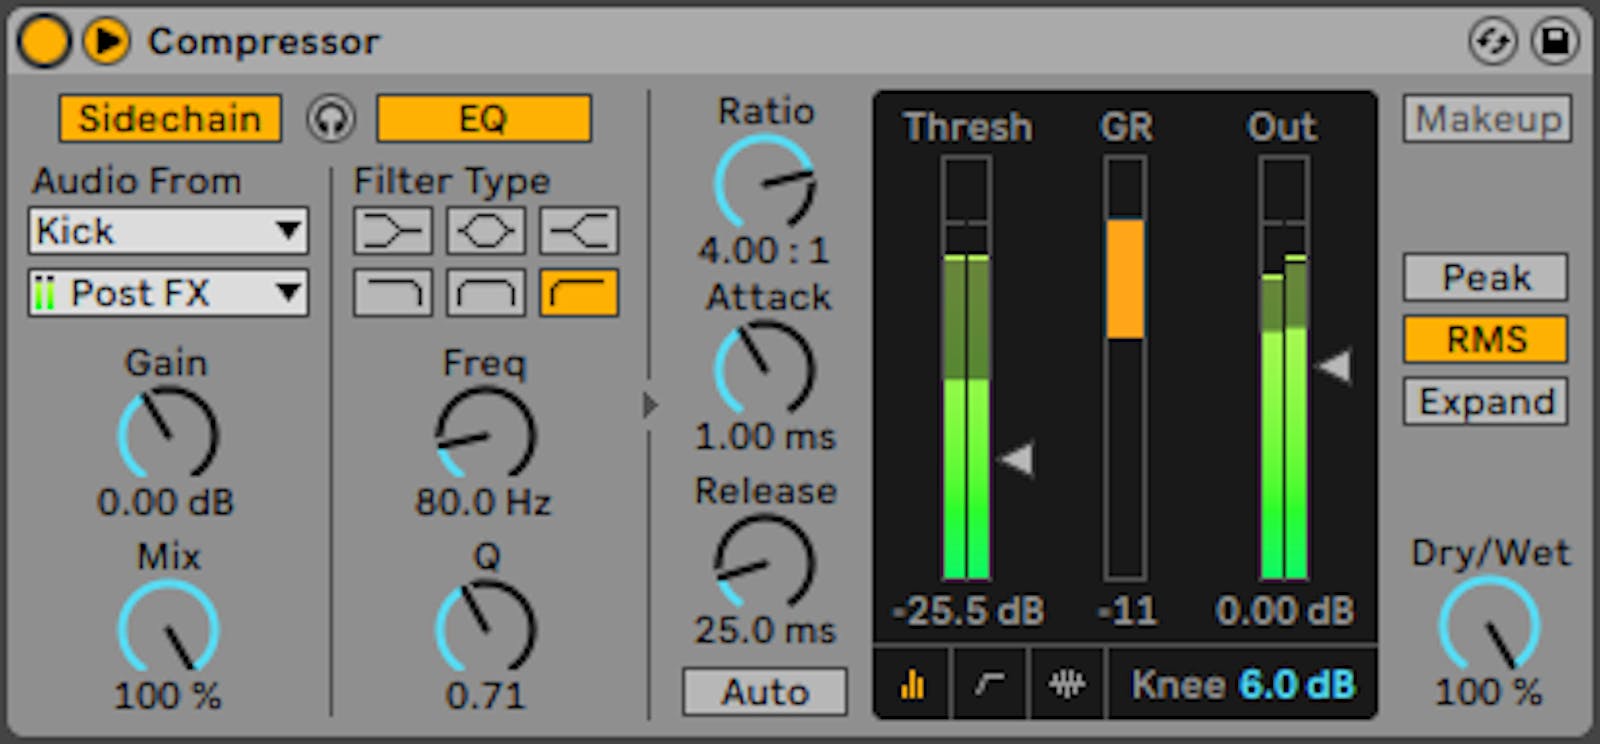
Compressor FX can also be used to enhance transients, or to bring up the average level of a kick drum signal, making it sound louder for longer. Here’s an example of Ableton Live’s compressor, used with extreme threshold and ratio values and a short attack time on an 808 kick.
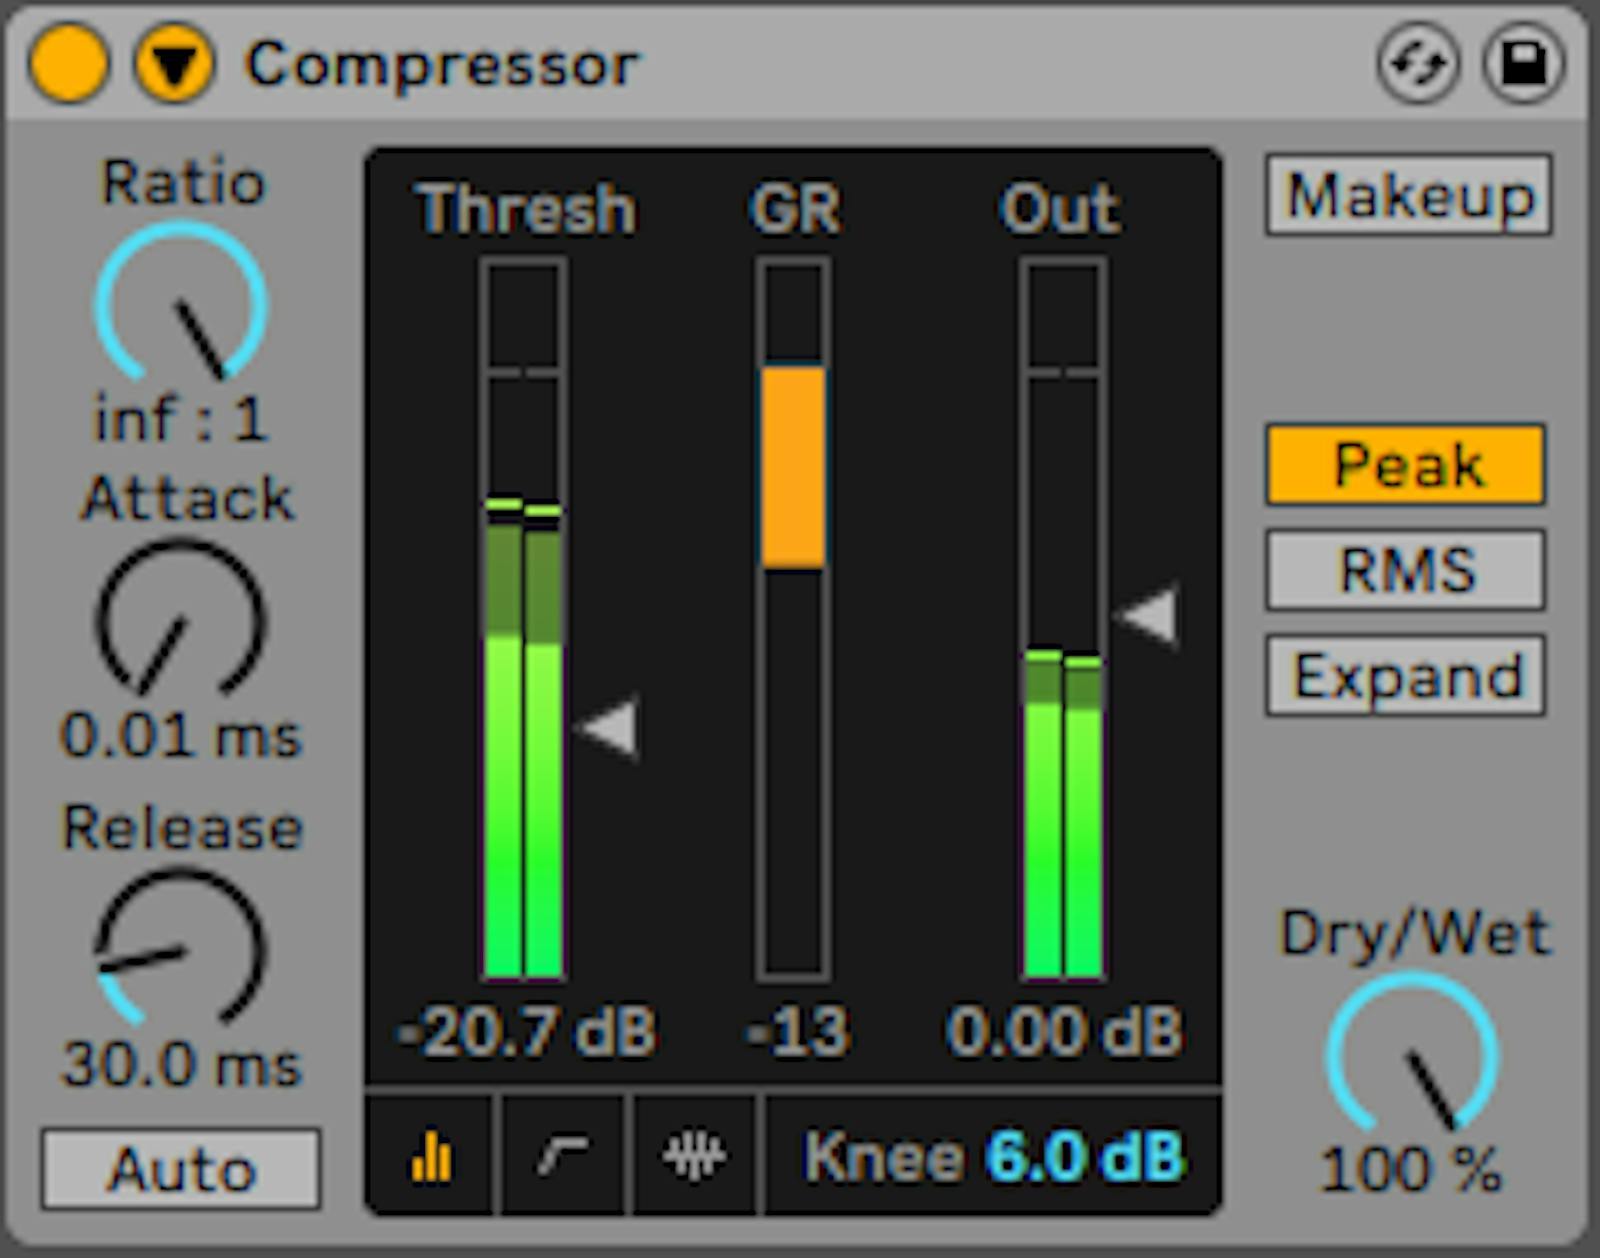
The first audio example is the unprocessed 808 kick. The second features the compressor effect. As you can hear, the compression makes the tail of the kick louder.
Making kicks mono
A final technique you may find useful is to make your kick drum mono instead of stereo. This has the benefit of making it appear to come from the center of the mix and can prevent your track from sounding like it’s more heavily weighted to the left or right speaker.
Most DAWs have a built-in tool for making audio tracks mono, or you could try the free Brainworx bx_solo.
In this audio clip, you hear a kick drum with a high element that comes more from the left speaker. We can make it mono in three ways with bx_solo. First, we can put both the left and right-hand channels dead centre by selecting the “M Solo” button, which stands for “mid” solo.
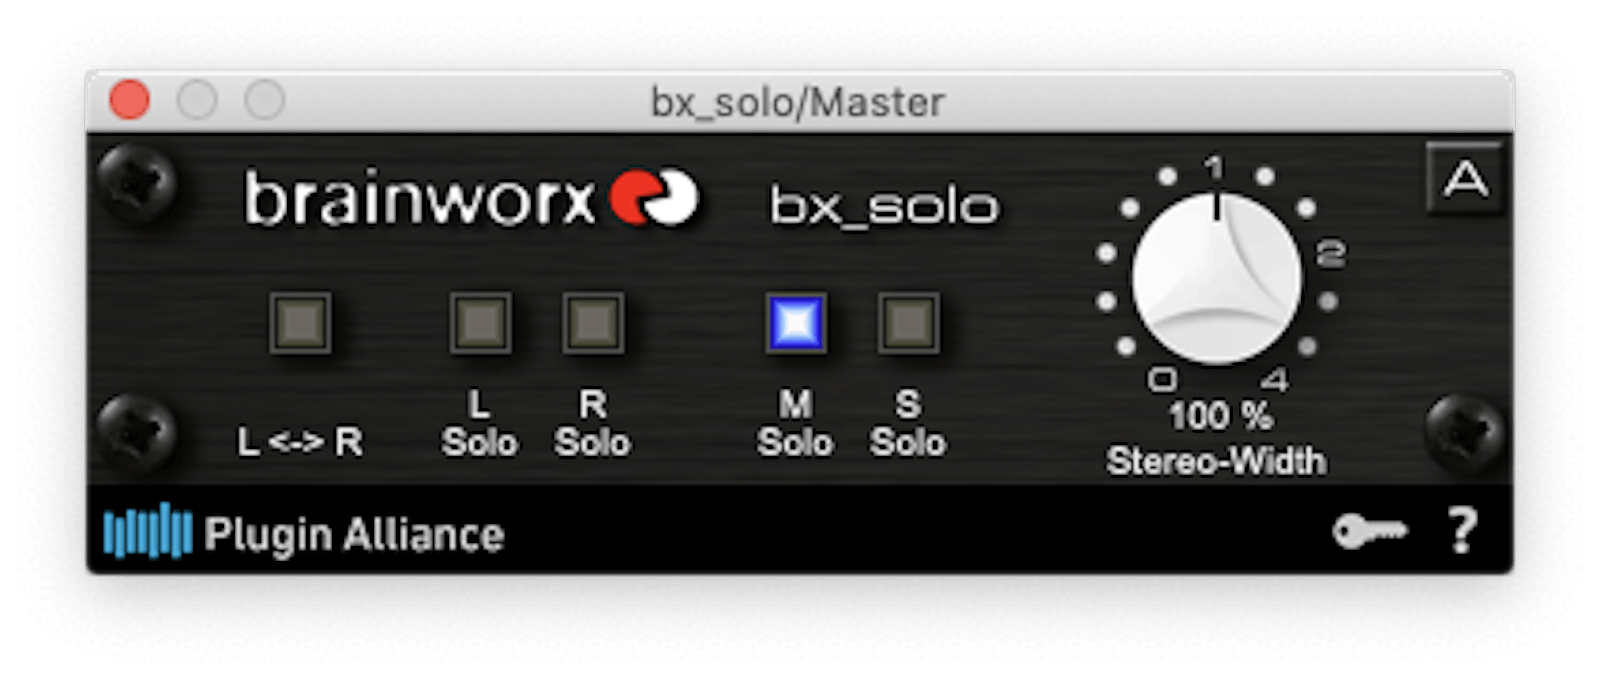
This gives us a combination of both the left and right signals, so we get a medium amount of the high element in the mix, but it’s panned to the centre. We can also isolate either the left or right channel and pan them to the centre.
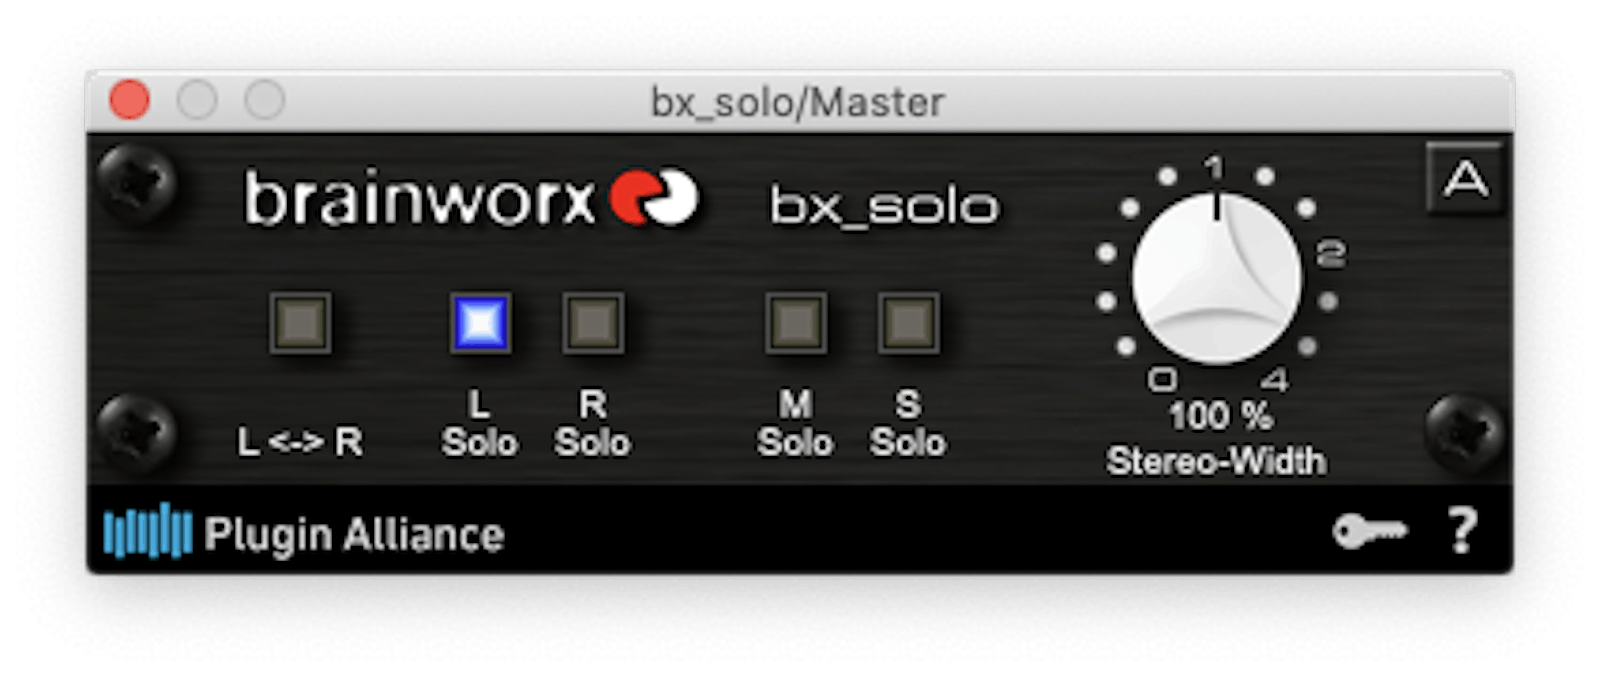
This time the “L Solo” button is selected, which solos the left channel. This is the channel where the high element is predominantly located, so the high part is relatively louder in the resulting mono signal.

This time the “R Solo” button is selected, which solos the right channel. As the high element isn’t so prominent in the right channel, it’s less obvious in the resulting mono output. If the desired result is to minimize the high element in the mix, this is the best option.
Hopefully you learned some tricks to get your kick to sound exactly right for your next track! For more explainers, check out our breakdown on convolution reverb.