Introducing Arcade 2.0: The next generation of Arcade. Alongside a major visual overhaul, the most important upgrade is the addition of Instruments: All new, fully playable chromatic sample instruments, with polyphony and up to 88 keys of velocity-sensitive, multi-sampled audio. Current users can get started with Arcade 2.0 now: Follow the steps here.
New to Arcade? Click here to download and play it now with a free trial.
Many of your favorite Lines — including Hooked, Drip, Memento, Modular Circuitry, and more — now feature Instruments. You can access each Line’s Instruments under the Instruments tab on the Line page, or you can browse every Instrument at once under the Instruments tab on the Search page.
Each new Line going forward will now include Instruments in addition to the Samplers you already know and love. Instruments are designed with playability and feel in mind, giving you even more flexibility than you previously had with Playable Pitch in Samplers. You can also mix and match our hundreds of Sources to create your own customized Instruments!
Overview
Instruments are multi-sampled, velocity-sensitive kits that you can play in Arcade. You can write your own chords and melodies and make adjustments to every sound. Instruments are chromatic and fully playable using any MIDI controller or your computer keyboard.
After downloading an Instrument, click “Play Instrument” to open up the Instruments Play Page.
Instruments: Play Page
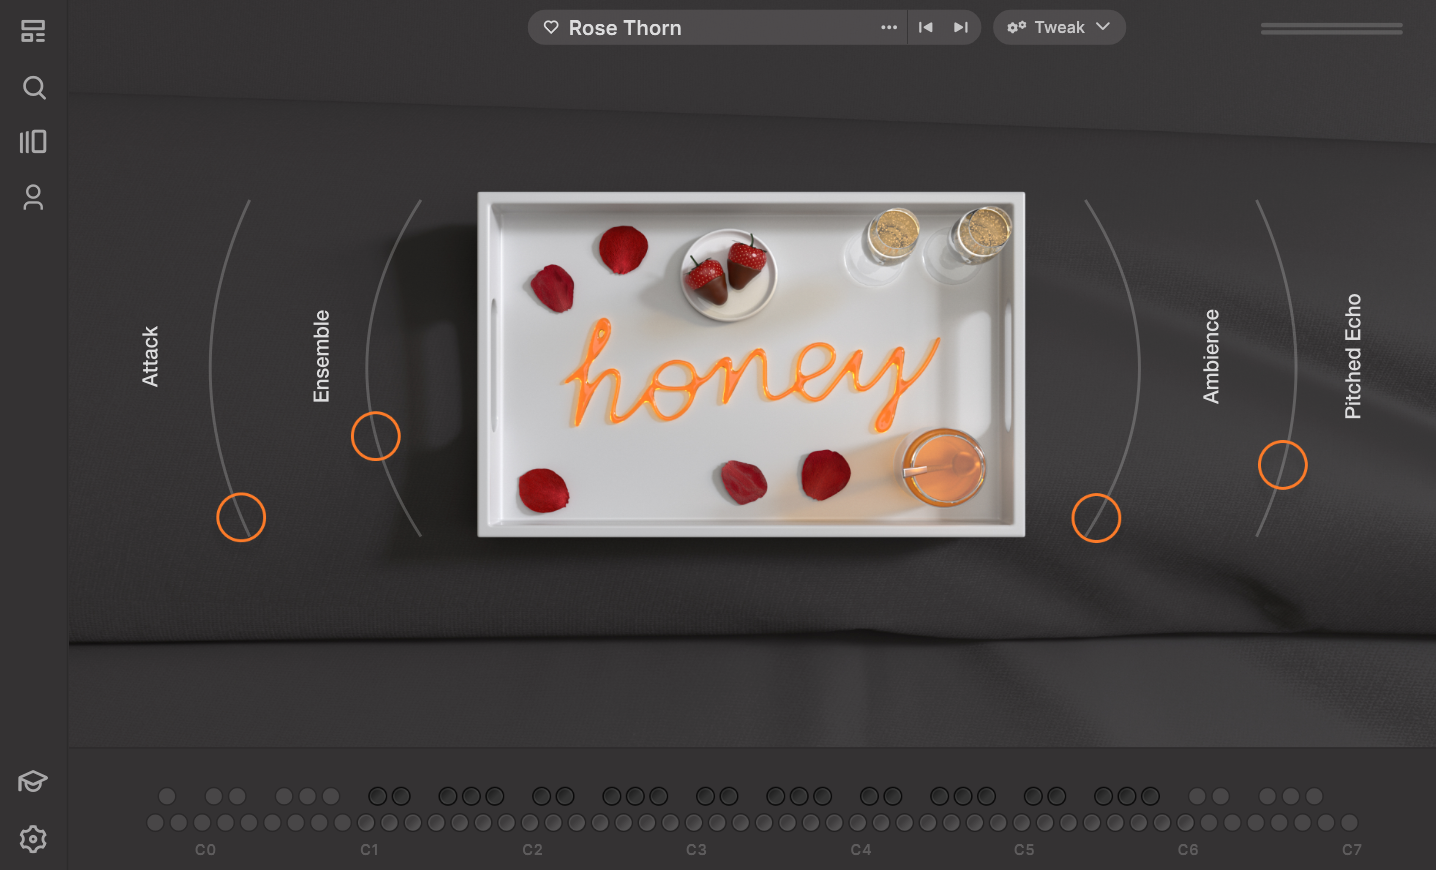
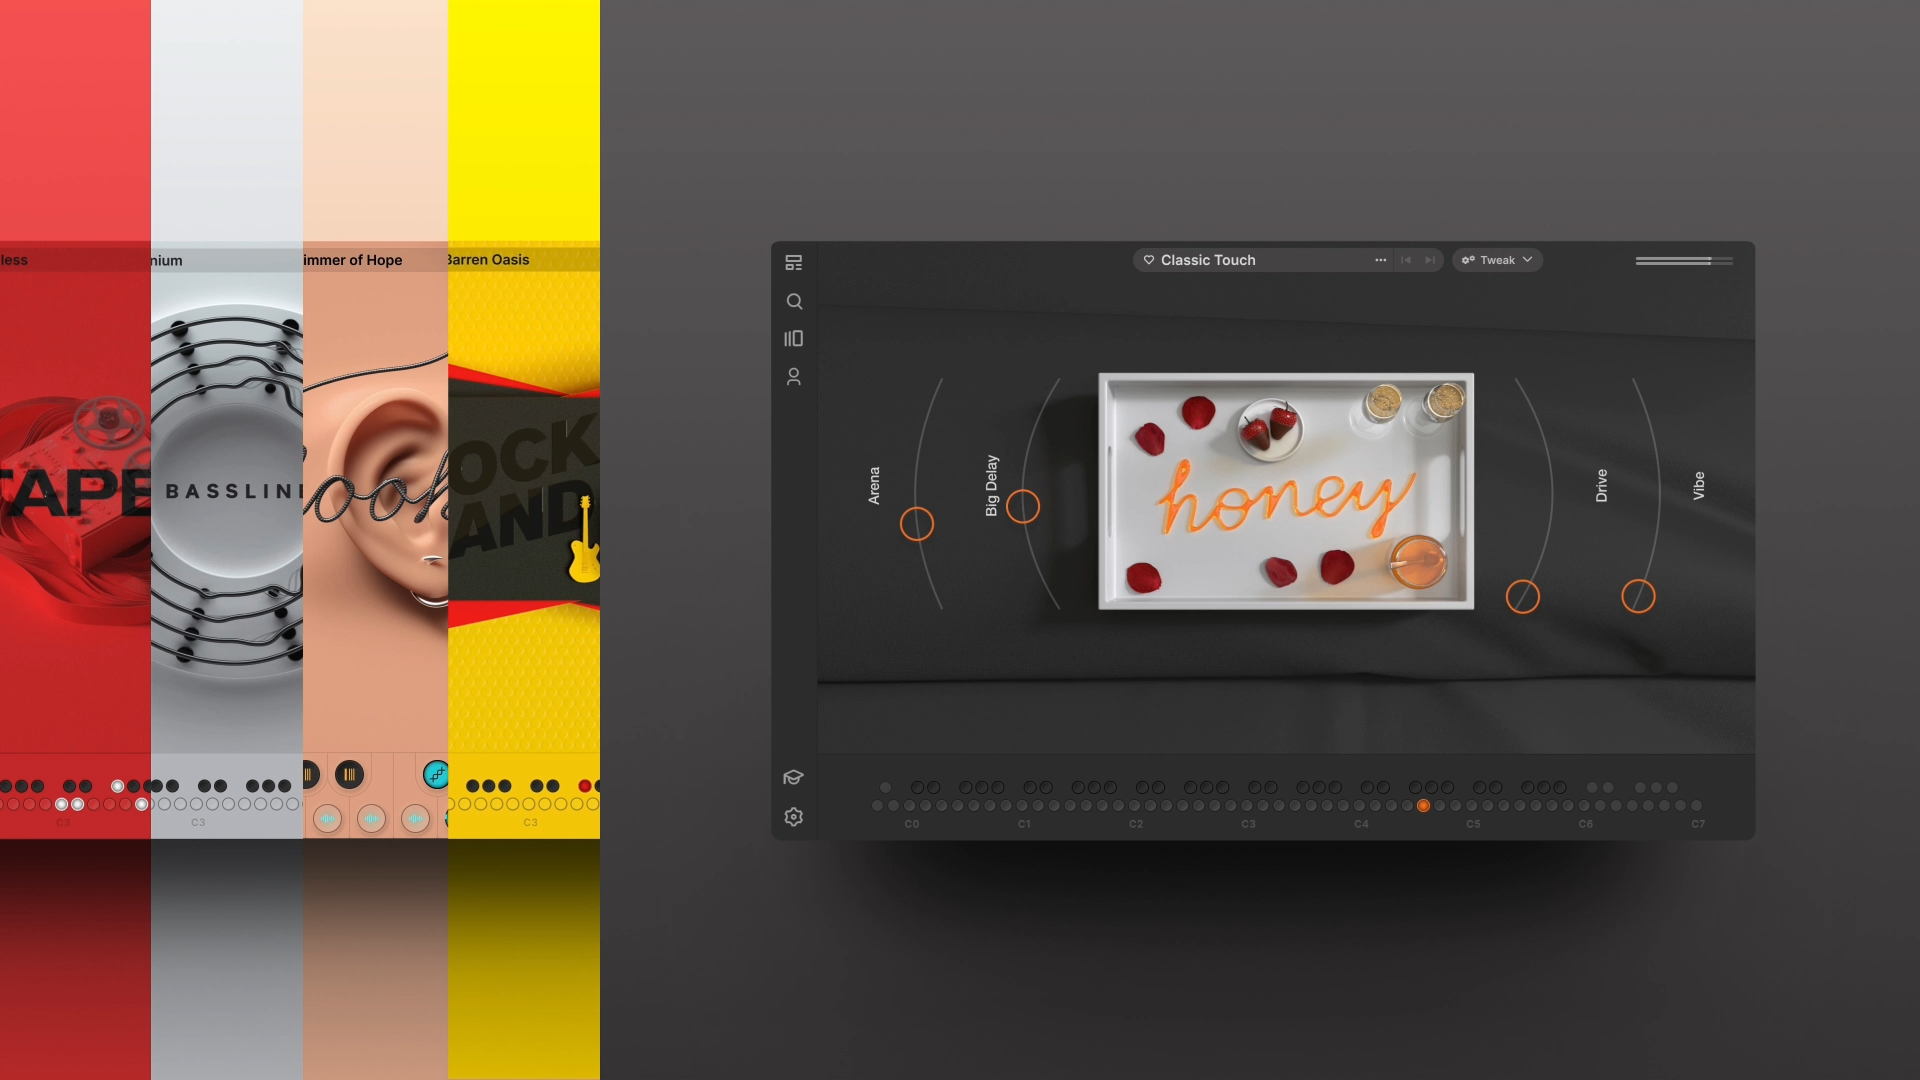
Opening any Instrument will bring you to the corresponding Play Page. Every Instrument page features the new Instrument keyboard and a set of four FX Macro sliders, which you’ll recognize from Samplers. Each panel of Macros is custom-designed for the Instrument, and every Macro slider can be edited and remapped in the Tweak page.
Instruments use deeply sampled velocity layers to make each instrument feel responsive. The full range of playable notes will depend on which Instrument you’re using: A keyboard instrument might feature up to 88 notes, while a flute instrument may only have notes in the higher octave region. Unavailable notes will be marked as blank on the Instrument keyboard.
At the top of the Instrument Play Page, you can click the “…” icon next to any Instrument’s name to add it to your favorites or save it as a custom Kit. You can find all custom Kits under Your Stuff, in the Instruments tab.
Instruments: Tweak Page
Click on the Tweak button at the top of any Play Page to enter the Tweak Page. From here, you’ll be able to customize any Instrument to fit your needs. Let’s take a look inside each of the four tabs inside the Instrument Tweak Page: Layer Edit, Mixer, Modulation, and Macros.
You can right-click on most parameters to view the following options: Assign Macro, Assign Modulation, and Learn Midi.
Assign Macro will assign the control to one of the four Macro sliders. Assign Modulation will assign the control to one of the four Modulation types. Learn Midi can be used to assign the control to a physical knob or slider on your MIDI controller.
TIP: Most parameters can be assigned to both a Modulation source and a Macro slider at the same time. Experiment with different combinations for awesome and unexpected results!
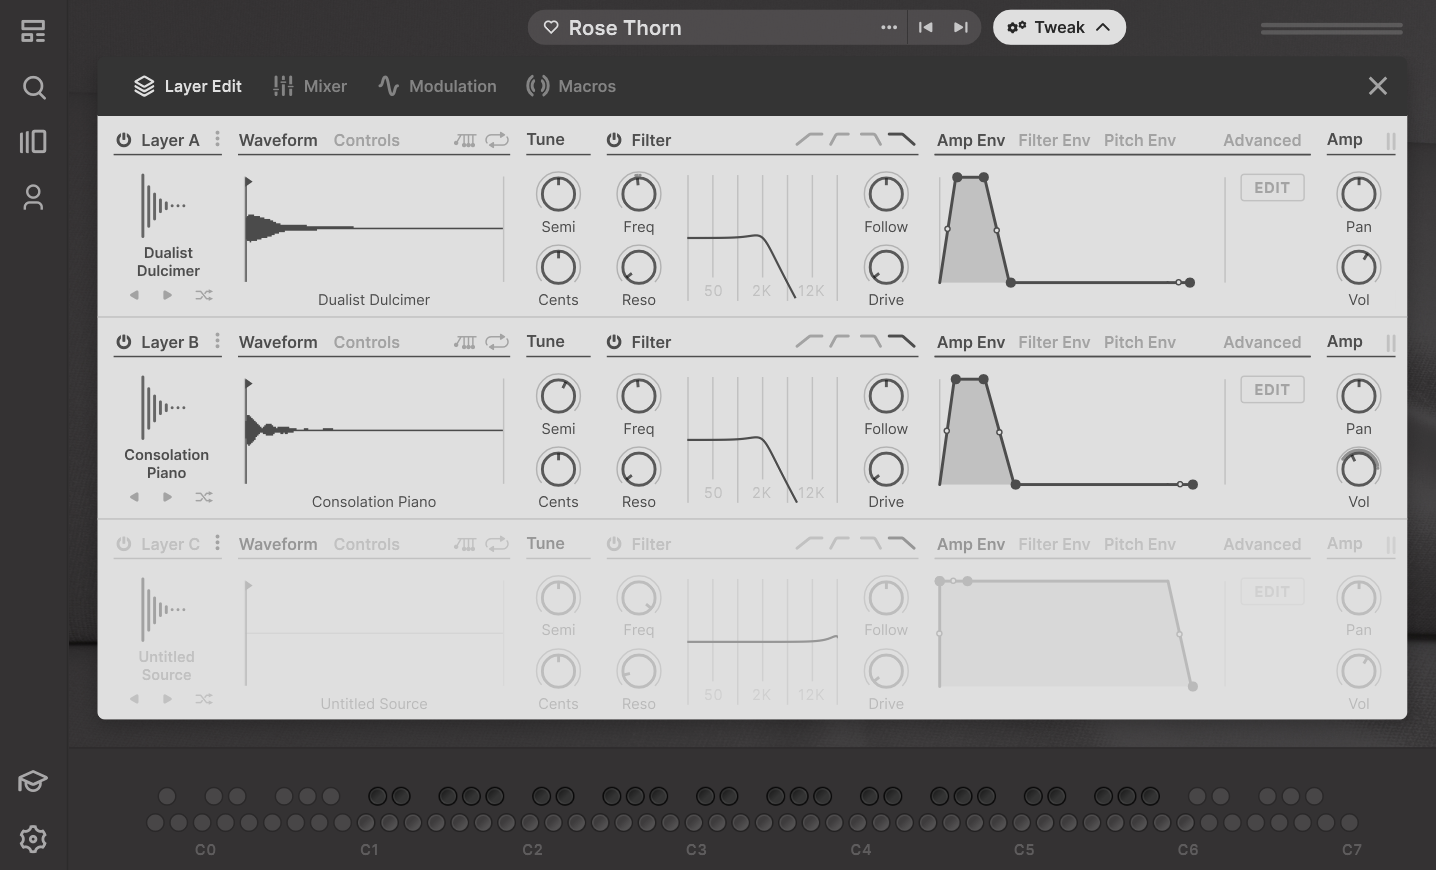
Layer Edit
In the Layer Edit tab, you can make adjustments to each Layer used in the Instrument. Each Instrument supports up to three different Layers.
A Source is a sampled instrument—a piano note, a sub bass, a kalimba pluck—that is recorded and mapped across the Instrument keyboard. Having three Layers allows you to create more customized, complex instruments using those Sources together.
Access the Source Browser by clicking on the waveform icon above any Layer name. Here, you can choose Sources from every Instrument in Arcade. You can also use the navigational arrows or the shuffle button, which will choose a random Source from the Source Browser.
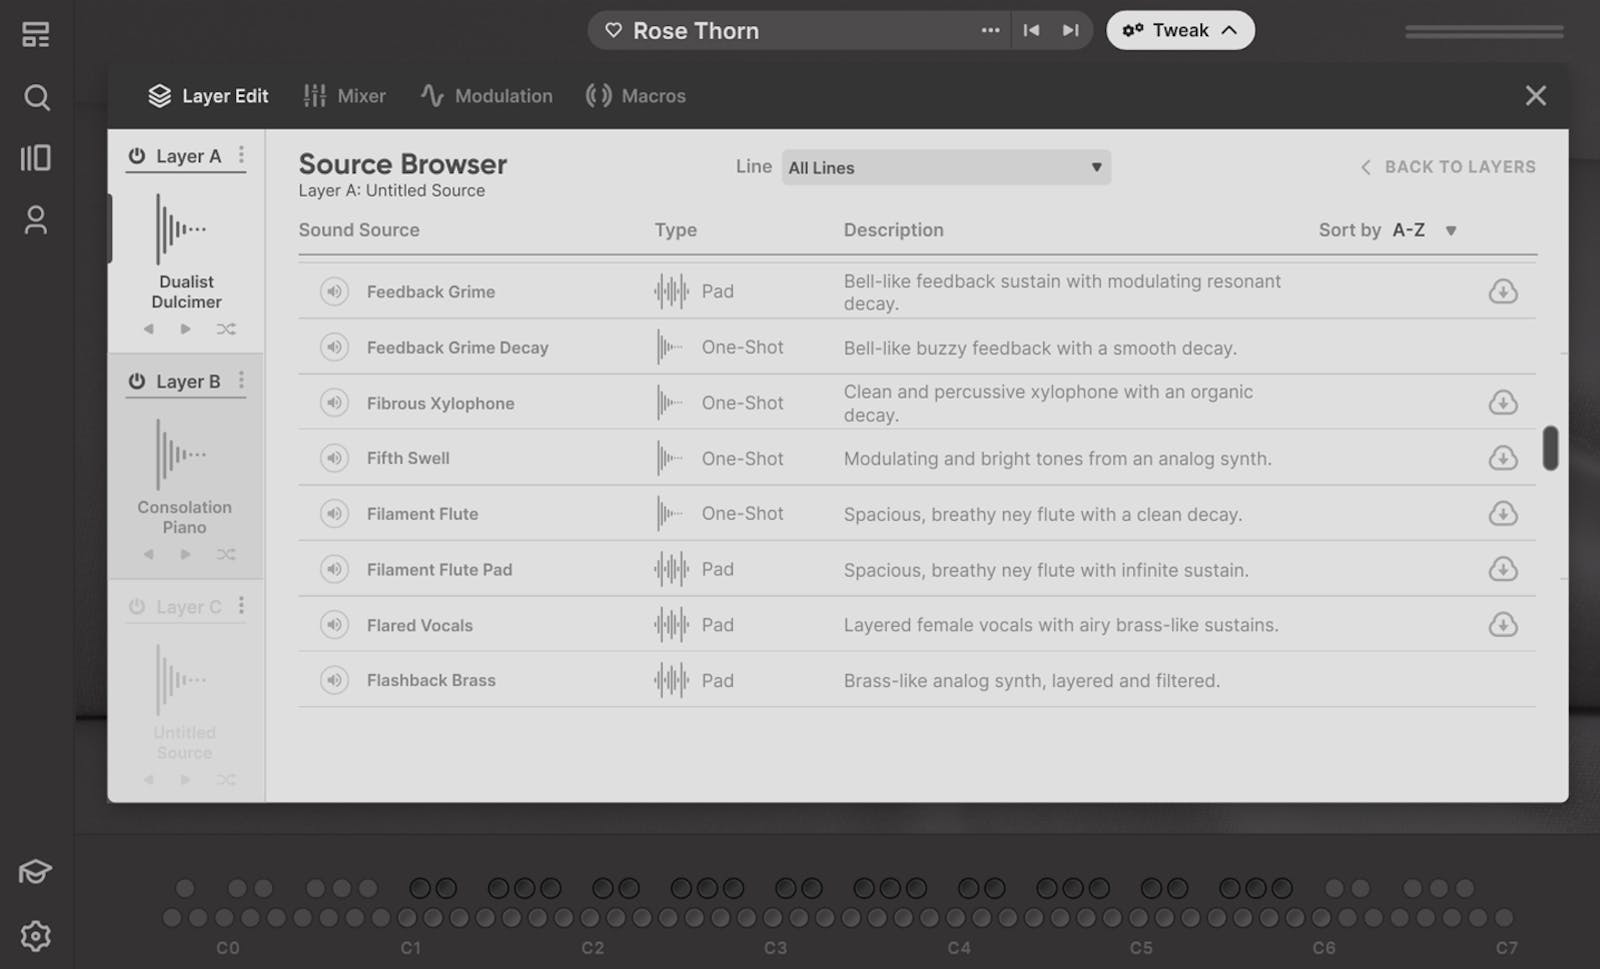
There are independent controls for the waveform, tuning, filter, envelopes, and amplification section of each Layer.
Use the markers in the Waveform section to change the starting point of any Source.
You can click Controls to view controls for Start point, Round Robin mode, and Loop (available when applicable). The two icons above the Loop controls indicate the type of Loop: Pendulum looping (in which a Source plays until the endpoint and then plays in reverse until it reaches the beginning again) and normal looping.
The Tune section lets you change the pitch of each Source by semitones or cents. The Filter section features four different filter modes (12db/24db slope for low-pass and high-pass) and knobs to control frequency, resonance, follow, and drive.
Amp Env, Filter Env, and Pitch Env allow you to change the attack, decay, sustain, and release settings for each envelope. You can adjust these settings by clicking and dragging the points on each graphical representation of the envelope, or by clicking Edit to access those same controls as ADSR knobs.
Clicking Advanced will reveal another panel of sound-shaping controls. Glide adjusts how long it takes for a pitch to slide to the next note you play. Velocity changes the velocity sensitivity of the instrument, while Color changes the timbre of sound by re-pitching the Source sample to the note you’re playing. Drag the note values above Range to adjust the range of the Instrument.
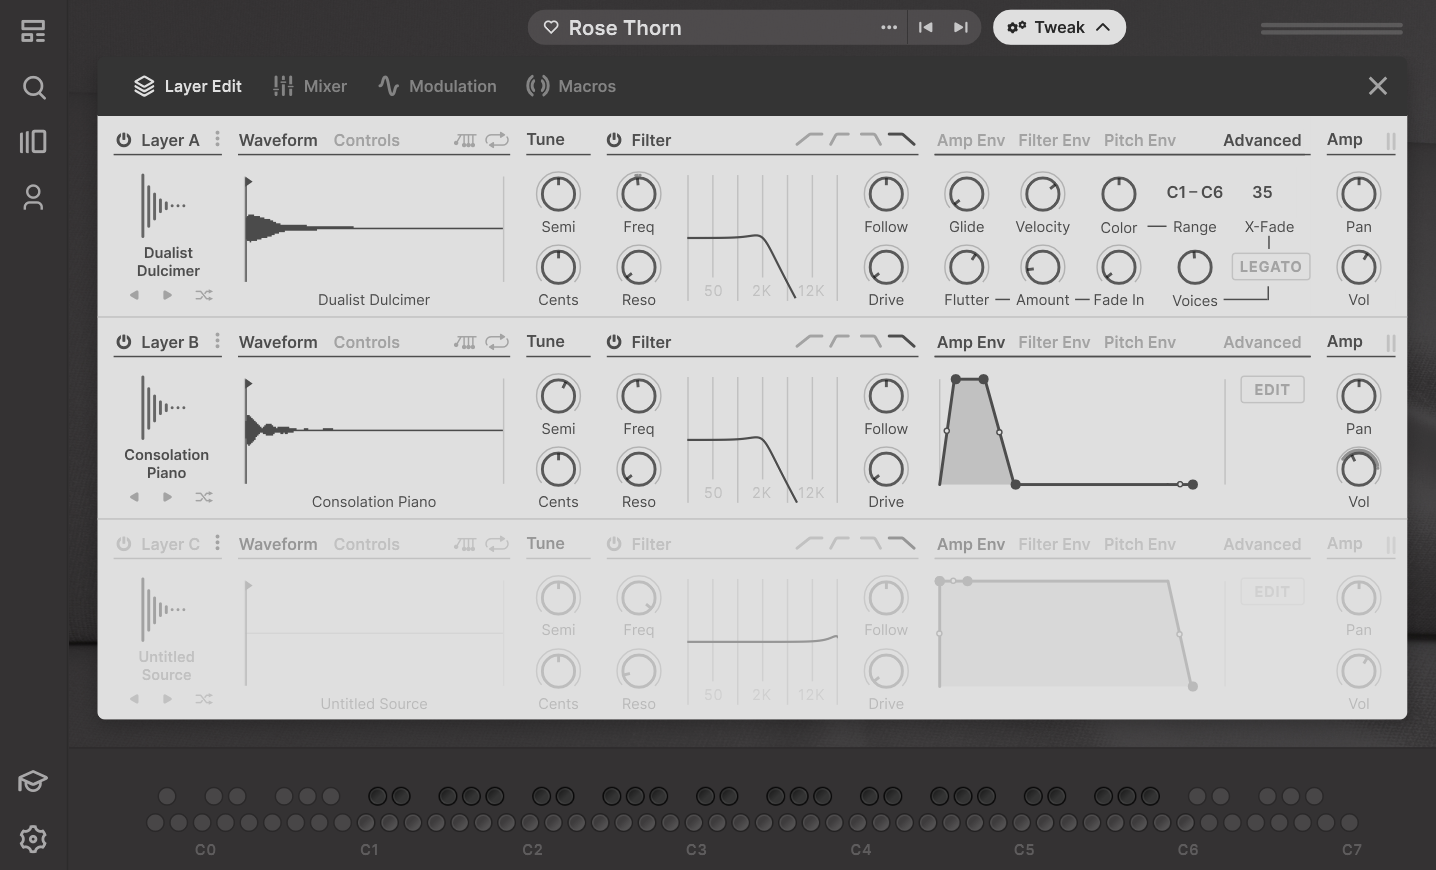
Flutter adjusts the rate of pitch modulation you can apply to a Source. The corresponding Amount and Fade In knobs determine the amount of Flutter and how quickly it starts modulating.
Voices allows you to set the number of playable voices, while Legato engages a smoother playing style (perfect for strings or slow-moving pads). X-Fade changes the speed and character of that smoothing. The Amp section lets you Pan the Layers individually and adjust the Volume as well. (These controls can also be found in the Mixer tab.)
Mixer
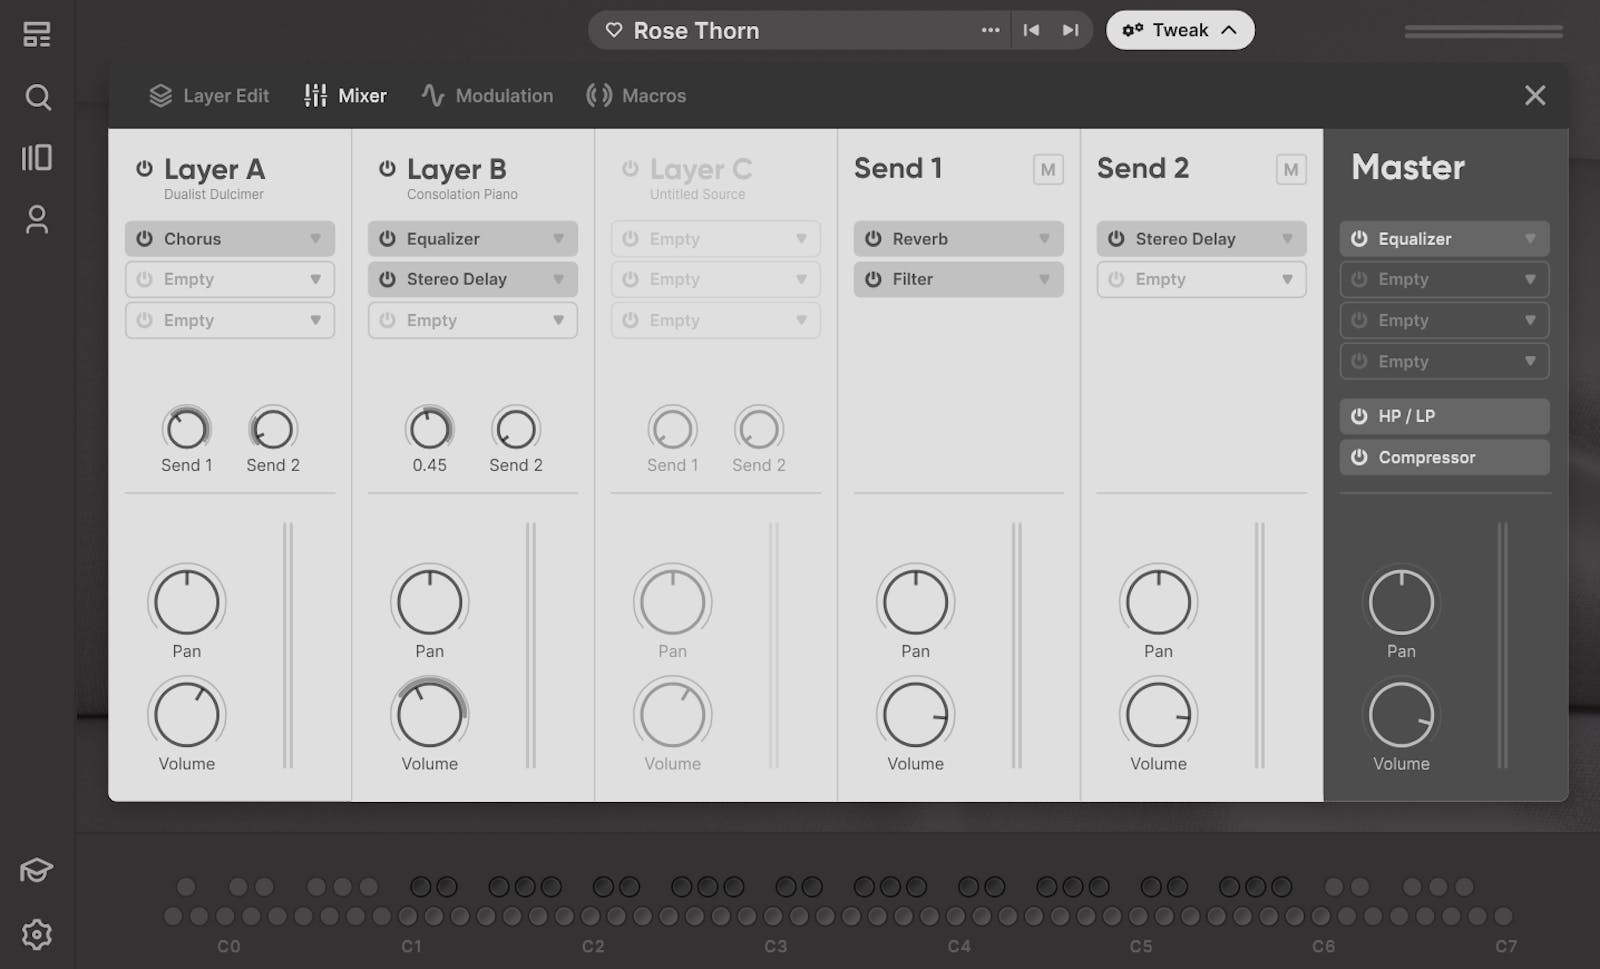
There are three kinds of channels in the Mixer tab: Layers, Sends, and the Master channel. You can control the levels and FX applied to each channel. Each Layer has three FX insert slots. Send FX channels support up to two FX each, while the Master channel supports up to four FX and also features a dedicated HP/LP filter and Compressor.
Modulation
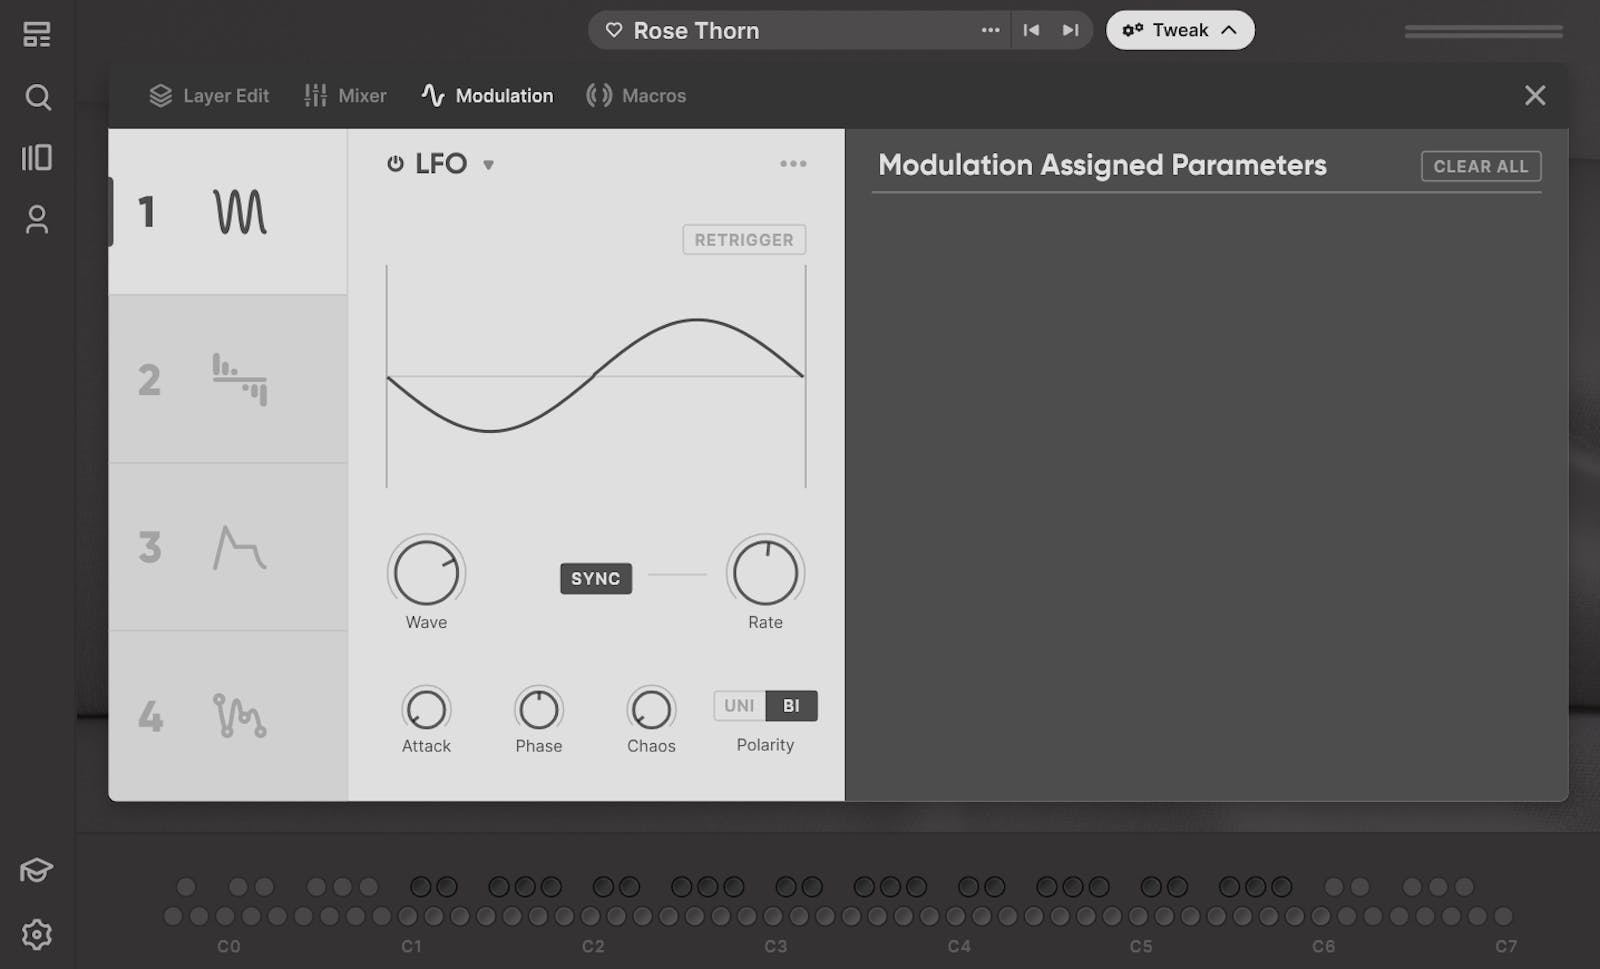
There are four different modulation sources in the Modulation tab: LFO, Sequencer, Envelope, and Custom LFO.
LFO features 7 different waveforms and can be tempo-synced, with your usual controls for Attack, Phase, Polarity (and a Chaos knob for, well, chaos, of course).
Sequencer is an intuitive step sequencer with up to 32-step resolution. Click and drag to set the boundaries of each step. You can set the Sequencer to Retrigger (restart the sequence when a new note is played), Invert (switch positive values to negative, and vice versa), and Randomize (set random boundary values). Clear will wipe all boundary values.
You’ll notice four small icons under the main Sequencer visualizer. These indicate what Loop mode the sequencer is on. They are, in order: Normal loop (sequence loops back from beginning), pendulum loop (sequence goes backwards when it reaches the end), reverse (sequence runs in reverse), and random (sequence is randomized).
TIP: Both LFO and Sequencer come with presets that you can access by clicking the “…” to the right of the name.
Finally, Envelope provides you with an ASHDR envelope, while Custom LFO allows you to draw in your own waveform (as seen on other Output products like THERMAL and PORTAL).
Double click on the Custom LFO waveform visualizer to create a new point. Click and drag to bend the waveshape to your liking. Use the Humanize knob to introduce a degree of randomness.
By assigning modulation sources to different parameters, you can shape how a Instrument sounds over time, giving it a sense of vibrancy and life. You can see which parameters are being affected and control how much the modulation is affecting each of them underneath Modulation Assigned Parameters.
Macros
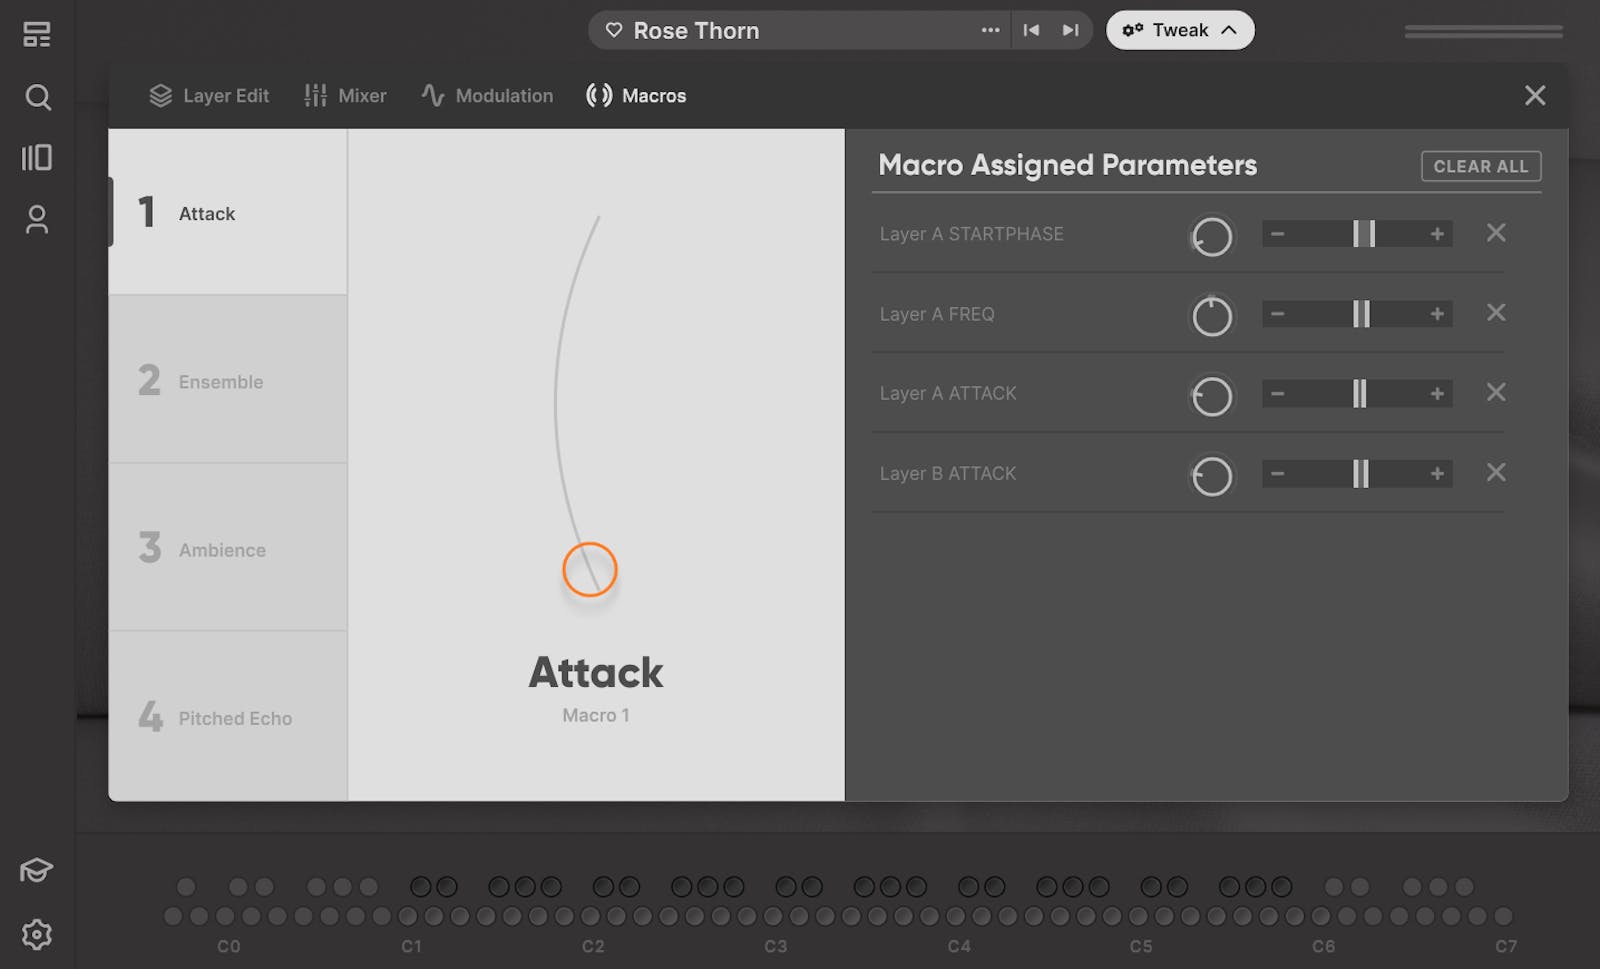
There are four different Macro sliders in every Instrument, and the Macros tab is where you can edit what those sliders do.
Each Macro slider can change multiple parameters to different degrees at the same time. You can change the degree for every individual parameter using the sliders underneath Macro Assigned Parameters. You can also double-click on the name of any Macro to edit it.
Want more Arcade? Check out our favorite instruments from the most recent releases. New sounds are added to Arcade every month, so there’s always something new to explore.